oiiotool: the OIIO Swiss Army Knife#
Overview#
The oiiotool program will read images (from any file format for which an ImageInput plugin can be found), perform various operations on them, and write images (in any format for which an ImageOutput plugin can be found).
The oiiotool utility is invoked as follows:
oiiotoolargs
oiiotool maintains an image stack, with the top image in the stack also called the current image. The stack begins containing no images.
oiiotool arguments consist of image names, actions, and flags.
Image names: When an image name is encountered, that image is pushed on the stack and becomes the new current image.
Actions: Alter the current image (replacing it with the alteration), or in some cases will pull more than one image off the stack (such as the current image and the next item on the stack) and then push a new result image onto the stack.
Flags: A small number of arguments are non-positional – the order doesn’t matter and their effect applies to the entire oiiotool execution.
Argument order matters!#
oiiotool processes actions and inputs in order. Thus, the order of operations on the command line is extremely important. For example,
oiiotool in.tif -resize 640x480 -o out.tif
has the effect of reading in.tif (thus making it the current
image), resizing it (taking the original off the stack, and placing the
resized result back on the stack), and then writing the new current image to
the file out.tif. Contrast that with the following subtly-incorrect
command:
oiiotool in.tif -o out.tif -resize 640x480
has the effect of reading in.tif (thus making it the current
image), saving the current image to the file out.tif (note that it
will be an exact copy of in.tif), resizing the current image, and
then… exiting. Thus, the resized image is never saved, and out.tif
will be an unaltered copy of in.tif.
The exceptions to this are non-positional flags, which affect the entire oiiotool command regardless of where they appear on the command line.
Optional modifiers#
Some arguments stand completely on their own (like --flip), others take one
or more subsequent command line arguments (like --resize or -o):
oiiotool foo.jpg --flip --resize 640x480 -o out.tif
A few arguments take optional modifiers for options that are so rarely-used
or confusing that they should not be required arguments. In these cases,
they are appended to the command name, after a colon (:), and with a
name=value format. Multiple optional modifiers can be chained together,
with colon separators. As an example:
    oiiotool in.tif --text:x=400:y=600:color=1,0,0 "Hello" -o out.tif
                    \____/\____/\____/\__________/ \____/
                      |     |     |        |         |
       command -------+     |     |        |         +----- required argument
                            |     |        |
optional modifiers ---------+-----+--------+
(separated by ':')
The value itself may be a single- or double-quoted string, and this is how
you would make a value that itself contains a : character (which would
otherwise denote the beginning of the next modifier).
Expression evaluation and substitution#
oiiotool can perform expression evaluation and substitution on
command-line arguments. As command-line arguments are needed, they are
scanned for containing braces { }. If found, the braces and any text they
enclose will be evaluated as an expression and replaced by its result. The
contents of an expression may be any of:
number
A numerical value (e.g., 1 or 3.14159).
imagename.metadata
The named metadata of an image.
If there is no metadata whose name matches, the expression will not have any substitution made and an error will be issued.
The imagename may be one of:
TOP(the top or current image),IMG[i]describing the i-th image on the stack (thusTOPis a synonym forIMG[0], the next image on the stack isIMG[1], etc.), orIMG[name]to denote an image named by filename or by label name. Remember that the positions on the stack (includingTOP) refer to at that moment, with successive commands changing the contents of the top image.The metadata may be any of:
the name of any standard metadata of the specified image (e.g.,
ImageDescription, orwidth)filename: the name of the file (e.g.,foo.tif)file_extension: the extension of the file (e.g.,tif)full_geom: the “full” or “display” sizegeom: the pixel data size in the form640x480+0+0nativeformat: the pixel data type from the file.MINCOLOR: the minimum value of each channel over the entire image (channels are comma-separated)MAXCOLOR: the maximum value of each channel over the entire image (channels are comma-separated)AVGCOLOR: the average pixel value of the image (channels are comma-separated)NONFINITE_COUNT: the number of pixel values in the image that are either NaN or Inf values. (Added in OIIO 2.5.10.)META: a multi-line string containing the full metadata of the image, similar to what would be printed withoiiotool -info -v.METABRIEF: a string containing the brief one-line description, similar to what would be printed that withoiiotool -info.METANATIVE: likeMETA, but for the “native” original information from when the file was read from disk.METANATIVEBRIEF: likeMETABRIEF, but for the “native” original information from when the file was read from disk.STATS: a multi-line string containing the image statistics that would be printed withoiiotool -stats.
imagename.’metadata’
If the metadata name is not a “C identifier” (initial letter followed by any number of letter, number, or underscore), it is permissible to use single or double quotes to enclose the metadata name. For example, suppose you want to retrieve metadata named “foo/bar”, you could say
{TOP.'foo/bar'}
Without the quotes, it might try to retrieve
TOP.foo(which doesn’t exist) and divide it bybar.imagename[metadata]
Another way to retrieve metadata, but with this notation, the result will be the empty string if the metadata does not exist (that is not an error).
{TOP[foo]}
{TOP['bar:baz']}
Arithmetic
Sub-expressions may be joined by
+,-,*,/,//, and%for arithmetic operations. (Note that like in Python 3,/is floating point division, while//signifies integer division.) Parentheses are supported, and standard operator precedence applies.Numeric and logical comparisons
Comparisons between numbers may be made with
<,<=,>,>=,==, and!=. In each case, the result will be 0 if the comparison is false, 1 if the comparison is true.The
<=>operator is a three-way comparison, returning -1, 0, or 1, depending on whether the first operand is less than, equal to, or greater than the second operand.The
&&operator has a result of 1 if both the left and right expressions are nonzero, otherwise 0. And||has a result of 1 if either the left or right are nonzero, 0 if both evaluate to 0.User variables
User variables are set by the
--setcommand. A reference to a user variable in an expression will be replaced by the value of the variable.Special variables
FRAME_NUMBER: the number of the frame in this iteration of wildcard expansion.FRAME_NUMBER_PAD: likeFRAME_NUMBER, but 0-padded based on the value set on the command line by--framepadding.NIMAGESthe number of images currently on the stack. (Added in OIIO2.4.11.)
Functions
getattribute(name): returns the global attribute that would be retrieved byOIIO::getattribute(name, ...). Thenamemay be enclosed in single or double quotes or be a single unquoted sequence of characters. (Added in OIIO 2.3.)var(name): returns the user variable of the give name. (Added in OIIO 2.4.)eq(a,b): returns 1 ifais equal tob, 0 otherwise. (Added in OIIO 2.4.)neq(a,b): returns 1 ifais not equal tob, 0 otherwise. (Added in OIIO 2.4.)not(val)returns 1 ifvalis a false value, 0 ifvalevaluatesto a true value. (Added in OIIO 2.4.)
To illustrate how this works, consider the following command, which trims a four-pixel border from all sides and outputs a new image prefixed with “cropped_”, without needing to know the resolution or filename of the original image:
oiiotool input.exr -cut "{TOP.width-2*4}x{TOP.height-2*4}+{TOP.x+4}+{TOP.y+4}" \
    -o cropped_{TOP.filename}
If you should come across filenames that contain curly braces (these are very
rare, but have been known to happen), you temporarily disable expression
evaluation with the --evaloff end --evalon flags. For example:
$ oiiotool --info "{weird}.exr"
> oiiotool ERROR: expression : syntax error at char 1 of `weird'

$ oiiotool --info --evaloff "{weird}.exr"
> {weird.exr}          : 2048 x 1536, 3 channel, half openexr
Control flow#
Scriptability is provided by the use of control flow statements. The usual programming constructs are supported:
Conditionals :
--ifcondition--thencommands…--elsecommands…--endifGeneral looping:
--whilecondition commands…--endwhileIteration :
--forvariable range commands…--endforThe range is a sequence of one to three comma-separated numbers: begin, end, and step; begin and end (step is assumed to be 1); or just end (begin assumed to be 0, step assumed to be 1). As in Python, the range has an “exclusive end” – when the variable is equal to end, the loop will terminate, without actually running the commands for the end value itself.
Section oiiotool commands for control flow contains more detailed descriptions of these commands and some examples to more clearly illustrate their behavior.
Frame sequences#
It is also possible to have oiiotool operate on numbered sequences of images. In effect, this will execute the oiiotool command several times, making substitutions to the sequence arguments in turn.
Image sequences are specified by having filename arguments to oiiotool use
either a numeric range wildcard (designated such as 1-10# or a
printf-like notation 1-10%d), or spelling out a more complex pattern
with --frames. For example:
oiiotool big.1-3#.tif --resize 100x100 -o small.1-3#.tif

oiiotool big.1-3%04d.tif --resize 100x100 -o small.1-3%04d.tif

oiiotool --frames 1-3 big.#.tif --resize 100x100 -o small.#.tif

oiiotool --frames 1-3 big.%04d.tif --resize 100x100 -o small.%04d.tif
Any of those will be the equivalent of having issued the following sequence of commands:
oiiotool big.0001.tif --resize 100x100 -o small.0001.tif
oiiotool big.0002.tif --resize 100x100 -o small.0002.tif
oiiotool big.0003.tif --resize 100x100 -o small.0003.tif
The frame range may be forwards (1-5) or backwards (5-1), and may give a
step size to skip frames (1-5x2 means 1, 3, 5) or take the complement of
the step size set (1-5y2 means 2, 4) and may combine subsequences with a
comma.
If you are using the # or @ wildcards, then the wildcard characters
themselves specify how many digits to pad with leading zeroes, with #
indicating 4 digits and @ indicating one digit (these may be combined:
#@@ means 6 digits). An optional --framepadding can also be used to
override the number of padding digits. For example:
oiiotool --framepadding 3 --frames 3,4,10-20x2 blah.#.tif
would match blah.003.tif, blah.004.tif, blah.010.tif, blah.012.tif,
blah.014.tif, blah.016.tif, blah.018.tif, blah.020.tif.
Alternately, you can use the printf notation, such as:
oiiotool --frames 3,4,10-20x2 blah.%03d.tif
When using frame ranges, keep in mind that by default, any error (such as an
input file not being found) on any frame will exit oiiotool right away.
However, the --skip-bad-frames command line option causes an error to skip
the rest of the processing for that frame, but try to continue iteration
with the next frame.
Two special command line arguments can be used to disable numeric wildcard
expansion: --wildcardoff disables numeric wildcard expansion for
subsequent command line arguments, until --wildcardon re-enables it for
subsequent command line arguments. Turning wildcard expansion off for
selected arguments can be helpful if you have arguments that must contain
the wildcard characters themselves. For example:
oiiotool input.@@@.tif --wildcardoff --sattrib Caption "lg@openimageio.org" \
    --wildcardon -o output.@@@.tif
In this example, the @ characters in the filenames should be expanded into
numeric file sequence wildcards, but the @ in the caption (denoting an
email address) should not.
Stereo wildcards#
oiiotool can also handle image sequences with separate left and
right images per frame using views. The %V wildcard will match the full
name of all views and %v will match the first character of each view. View
names default to “left” and “right”, but may be overridden using the
--views option. For example:
oiiotool --frames 1-5 blah_%V.#.tif
would match blah_left.0001.tif, blah_right.0001.tif,
blah_left.0002.tif, blah_right.0002.tif, blah_left.0003.tif,
blah_right.0003.tif, blah_left.0004.tif, blah_right.0004.tif,
blah_left.0005.tif, blah_right.0005.tif, and
oiiotool --frames 1-5 blah_%v.#.tif
would match blah_l.0001.tif, blah_r.0001.tif, blah_l.0002.tif,
blah_r.0002.tif, blah_l.0003.tif, blah_r.0003.tif, blah_l.0004.tif,
blah_r.0004.tif, blah_l.0005.tif, blah_r.0005.tif, but
oiiotool --views left --frames 1-5 blah_%v.#.tif
would only match blah_l.0001.tif, blah_l.0002.tif, blah_l.0003.tif,
blah_l.0004.tif, blah_l.0005.tif.
Dealing with multi-subimage/multi-part files#
Some file formats allow storing multiple images in one file (notably OpenEXR, which calls them “multi-part”). There are some special behaviors to be aware of for multi-subimage files.
Using oiiotool for a simple input-to-output copy will preserve all of the subimages (assuming that the output format can accommodate multiple subimages):
oiiotool multipart.exr -o another.exr
Most oiiotool commands by default work on just the first subimage of their input, discarding the others. For example:
oiiotool multipart.exr --colorconvert lnf aces -o out.exr
In this example, only the first subimage in multipart.exr will be color
transformed and output to out.exr. Any other subimages in the input will
not be used or copied.
Using the -a command tells oiiotool to try to preserve all
subimages from the inputs and apply all computations to all subimages:
oiiotool -a multipart.exr --colorconvert lnf aces -o out.exr
Now all subimages of multipart.exr will be transformed and output.
But that might not be enough. Perhaps there are some subimages that need the
color conversion, and others that do not. Many oiiotool commands
take an optional modifier :subimages=... that can restrict the operation
to certain subimages. The argument is a comma-separated list of any of the
following: (a) an integer index of a subimage to include, or a minus sign
(-) followed by an integer index of a subimage to exclude; (b) the name
(as returned by the metadata “oiio:subimagename”) of a subimage to include,
or to exclude if preceded by a -; (c) the special string “all”, meaning all
subimages. Examples:
# Color convert only subimages 0, 3, and 4, leave the rest as-is
oiiotool -a multipart.exr --colorconvert:subimages=0,3,4 lnf aces -o out.exr

# Color convert all subimages EXCEPT the one named "normal"
oiiotool -a multipart.exr --colorconvert:subimages=-normal lnf aces -o out.exr
oiiotool Tutorial / Recipes#
This section will give quick examples of common uses of oiiotool to get you started. They should be fairly intuitive, but you can read the subsequent sections of this chapter for all the details on every command.
Printing information about images#
To print the name, format, resolution, and data type of an image (or many images):
oiiotool --info *.tif
To also print the full metadata about each input image, use both
--info and -v:
oiiotool --info -v *.tif
or:
oiiotool --info:verbose=1 *.tif
To print info about all subimages and/or MIP-map levels of each input image,
use the -a flag:
oiiotool --info -v -a mipmap.exr
To print statistics giving the minimum, maximum, average, and standard deviation of each channel of an image, as well as other information about the pixels:
oiiotool --stats img_2012.jpg
The --info, --stats, -v, and -a flags may be used in any
combination.
Converting between file formats#
It’s a snap to convert among image formats supported by OpenImageIO (i.e., for which ImageInput and ImageOutput plugins can be found). The oiiotool utility will simply infer the file format from the file extension. The following example converts a PNG image to JPEG:
oiiotool lena.png -o lena.jpg
The first argument (lena.png) is a filename, causing oiiotool to
read the file and makes it the current image. The -o command
outputs the current image to the filename specified by the next
argument.
Thus, the above command should be read to mean, “Read lena.png into the
current image, then output the current image as lena.jpg (using whatever
file format is traditionally associated with the .jpg extension).”
Comparing two images#
To print a report of the differences between two images of the same resolution:
oiiotool old.tif new.tif --diff
If you also want to save an image showing just the differences:
oiiotool old.tif new.tif --diff --absdiff -o diff.tif
This looks complicated, but it’s really simple: read old.tif, read
new.tif (pushing old.tif down on the image stack), report the
differences between them, subtract new.tif from old.tif and replace them
both with the difference image, replace that with its absolute value, then
save that image to diff.tif.
Sometimes you want to compare images but allow a certain number of small difference, say allowing the comparison to pass as long as no more than 1% of pixels differs by more than 1/255, and as long as no single pixel differs by more than 2/255. You can do this with thresholds:
oiiotool old.tif new.tif --fail 0.004 -failpercent 1 --hardfail 0.008 --diff
Changing the data format or bit depth#
Just use the -d option to specify a pixel data format for all subsequent
outputs. For example, assuming that in.tif uses 16-bit unsigned integer
pixels, the following will convert it to an 8-bit unsigned pixels:
oiiotool in.tif -d uint8 -o out.tif
For formats that support per-channel data formats, you can override the
format for one particular channel using -d CHNAME=TYPE. For example,
assuming rgbaz.exr is a float RGBAZ file, and we wish to convert it to
be half for RGBA, and float for Z. That can be accomplished with the
following command:
oiiotool rgbaz.tif -d half -d Z=float -o rgbaz2.exr
When converting from a high bit depth data type (like float or half) to a very
low bit depth data type (such as uint8), you may notice “banding” artifacts in
smooth gradients. To combat this, you can use the --dither option to add
random dither before the low bit depth quantization, which has the effect of
masking the banding:
oiiotool half.exr -d uint8 --dither -o out8.tif
Note that --dither turns dither on for all 8 bit (or fewer) output
files. Alternately, you can enable dither for individual outputs using
a modifier to -o (the value of the dither modifier is the random seed
that will be used):
oiiotool half.exr -d uint8 -o:dither=1 out8.tif
Changing the compression#
The following command converts writes a TIFF file, specifically using LZW compression:
oiiotool in.tif --compression lzw -o compressed.tif
The following command writes its results as a JPEG file at a compression quality of 50 (pretty severe compression), illustrating how some compression methods allow a quality metric to be optionally appended to the name:
oiiotool big.jpg --compression jpeg:50 -o small.jpg
Converting between scanline and tiled images#
Convert a scanline file to a tiled file with 16x16 tiles:
oiiotool s.tif --tile 16 16 -o t.tif
Convert a tiled file to scanline:
oiiotool t.tif --scanline -o s.tif
Adding captions or metadata#
Add a caption to the metadata:
oiiotool foo.jpg --caption "Hawaii vacation" -o bar.jpg
Add keywords to the metadata:
oiiotool foo.jpg --keyword "volcano,lava" -o bar.jpg
Add other arbitrary metadata:
oiiotool in.exr --attrib "FStop" 22.0 \
        --attrib "IPTC:City" "Berkeley" -o out.exr

oiiotool in.exr --attrib:type=timecode smpte:TimeCode "11:34:04:00" \
        -o out.exr

oiiotool in.exr --attrib:type=int[4] FaceBBox "140,300,219,460" \
        -o out.exr
Changing image boundaries and borders#
Change the origin of the pixel data window:
oiiotool in.exr --origin +256+80 -o offset.exr
Change the display window:
oiiotool in.exr --fullsize 1024x768+16+16 -o out.exr
Change the display window to match the data window:
oiiotool in.exr --fullpixels -o out.exr
Crop (trim) an image to a 128x128 region whose upper left corner is at location (900,300), leaving the remaining pixels in their original positions on the image plane (i.e., the resulting image will have origin at 900,300), and retaining its original display window:
oiiotool in.exr --crop 128x128+900+300 -o out.exr
Cut (trim and extract) a 128x128 region whose upper left corner is at location (900,300), moving the result to the origin (0,0) of the image plane and setting the display window to the new pixel data window:
oiiotool in.exr --cut 128x128+900+300 -o out.exr
Put a constant-color border around all sides of an image, without needing to know the resolution of the input image:
# BW: Border width
BW=40
COLOR=.2,.2,.2,1.0
oiiotool in.tif \
    --pattern constant:color=$COLOR "{TOP.width+2*$BW}x{TOP.height+2*$BW}" "{TOP.nchannels}" --paste "+$BW+$BW" \
    -o out.tif
Scale the values in an image#
Reduce the brightness of the R, G, and B channels by 10%, but leave the A channel at its original value:
oiiotool original.exr --mulc 0.9,0.9,0.9,1.0 -o out.exr
Remove gamma-correction from an image#
Convert a gamma-corrected image (with gamma = 2.2) to linear values:
oiiotool corrected.exr --powc 2.2,2.2,2.2,1.0 -o linear.exr
Resize an image#
Resize to a specific resolution:
oiiotool original.tif --resize 1024x768 -o specific.tif
Resize both dimensions by a known scale factor:
oiiotool original.tif --resize 200% -o big.tif
oiiotool original.tif --resize 25% -o small.tif
Resize each dimension, independently, by known scale factors:
oiiotool original.tif --resize 300%x200% -o big.tif
oiiotool original.tif --resize 100%x25% -o small.tif
Resize to a known resolution in one dimension, with the other dimension automatically computed to preserve aspect ratio (just specify 0 as the resolution in the dimension to be automatically computed):
oiiotool original.tif --resize 200x0 -o out.tif
oiiotool original.tif --resize 0x1024 -o out.tif
Resize to fit into a given resolution, keeping the original aspect ratio and padding with black where necessary to fit into the specified resolution:
oiiotool original.tif --fit 640x480 -o fit.tif
Color convert an image#
This command linearizes a JPEG assumed to be in sRGB, saving as an HDRI OpenEXR file:
oiiotool photo.jpg --colorconvert sRGB linear -o output.exr
And the other direction:
oiiotool render.exr --colorconvert linear sRGB -o fortheweb.png
This converts between two named color spaces (presumably defined by your facility’s OpenColorIO configuration):
oiiotool in.dpx --colorconvert lg10 lnf -o out.exr
Grayscale and RGB#
Turn a single channel image into a 3-channel gray RGB:
oiiotool gray.tif --ch 0,0,0 -o rgb.tif
Convert a color image to luminance grayscale:
oiiotool RGB.tif --chsum:weight=.2126,.7152,.0722 -o luma.tif
Channel reordering and padding#
Copy just the color from an RGBA file, truncating the A, yielding RGB only:
oiiotool rgba.tif --ch R,G,B -o rgb.tif
Zero out the red and green channels:
oiiotool rgb.tif --ch R=0,G=0,B -o justblue.tif
Swap the red and blue channels from an RGBA image:
oiiotool rgba.tif --ch R=B,G,B=R,A -o bgra.tif
Extract just the named channels from a many-channel image, as efficiently as possible (avoiding memory and I/O for the unused channels):
oiiotool -i:ch=R,G,B manychannels.exr -o rgb.exr
Add an alpha channel to an RGB image, setting it to 1.0 everywhere, and naming it “A” so it will be recognized as an alpha channel:
oiiotool rgb.tif --ch R,G,B,A=1.0 -o rgba.tif
Add an alpha channel to an RGB image, setting it to be the same as the R channel and naming it “A” so it will be recognized as an alpha channel:
oiiotool rgb.tif --ch R,G,B,A=R -o rgba.tif
Add a z channel to an RGBA image, setting it to 3.0 everywhere, and naming it “Z” so it will be recognized as a depth channel:
oiiotool rgba.exr --ch R,G,B,A,Z=3.0 -o rgbaz.exr
Copy metadata from one image to another#
Suppose you have a (non-OIIO) application that consumes input Exr files and produces output Exr files, but along the way loses crucial metadata from the input files that you want carried along. This command will add all the metadata from the first image to the pixels of the second image:
oiiotool metaonly.exr pixelsonly.exr --pastemeta -o combined.exr
Fade between two images#
Fade 30% of the way from A to B:
oiiotool A.exr --mulc 0.7 B.exr --mulc 0.3 --add -o fade.exr
Simple compositing#
Simple “over” composite of aligned foreground and background:
oiiotool fg.exr bg.exr --over -o composite.exr
Composite of small foreground over background, with offset:
oiiotool fg.exr --origin +512+89 bg.exr --over -o composite.exr
Creating an animated GIF from still images#
Combine several separate JPEG images into an animated GIF with a frame rate of 8 frames per second:
oiiotool foo??.jpg --siappendall --attrib FramesPerSecond 10.0 -o anim.gif
Frame sequences: composite a sequence of images#
Composite foreground images over background images for a series of files with frame numbers in their names:
oiiotool fg.1-50%04d.exr bg.1-50%04d.exr --over -o comp.1-50%04d.exr
Or:
oiiotool --frames 1-50 fg.%04d.exr bg.%04d.exr --over -o comp.%04d.exr
Expression example: annotate the image with its caption#
This command reads a file, and draws any text in the “ImageDescription” metadata, 30 pixels from the bottom of the image:
oiiotool input.exr --text:x=30:y={TOP.height-30} {TOP.ImageDescription} -o out.exr
Note that this works without needing to know the caption ahead of time, and will always put the text 30 pixels from the bottom of the image without requiring you to know the resolution.
Contrast enhancement: stretch pixel value range to exactly fit [0-1]#
This command reads a file, subtracts the minimum pixel value and then divides by the (new) maximum value, per channel, thus expanding its pixel values to the full [0-1] range:
oiiotool input.tif -subc {TOP.MINCOLOR} -divc {TOP.MAXCOLOR} -o out.tif
Note that this is a naive way to improve contrast and because each channel is handled independently, it may result in color hue shifts.
Split a multi-image file into separate files#
Take a multi-image TIFF file, split into its constituent subimages and
output each one to a different file, with names sub0001.tif,
sub0002.tif, etc.:
oiiotool multi.tif -sisplit -o:all=1 sub%04d.tif
oiiotool commands: general flags#
- --help#
Prints full usage information to the terminal, as well as information about image formats supported, known color spaces, filters, OIIO build options and library dependencies.
- --version#
Prints the version designation of the OIIO library.
- -v#
Verbose status messages — print out more information about what oiiotool is doing at every step.
- -q#
Quet mode — print out less information about what oiiotool is doing (only errors).
- -n#
No saved output — do not save any image files. This is helpful for certain kinds of tests, or in combination with
--runstatsor--debug, for getting detailed information about what a command sequence will do and what it costs, but without producing any saved output files.
- --no-error-exit#
If an error is encountered, try to continue executing any remaining commands, rather than exiting immediately. Use with caution!
- --debug#
Debug mode — print lots of information about what operations are being performed.
- --runstats#
Print timing and memory statistics about the work done by oiiotool.
- --buildinfo#
Print information about OIIO build-time options and dependencies. This can be useful when reporting issues.
- -a#
Performs all operations on all subimages and/or MIPmap levels of each input image. Without
-a, generally each input image will really only read the top-level MIPmap of the first subimage of the file.
- --no-clobber#
Sets “no clobber” mode, in which existing images on disk will never be overridden, even if the
-ocommand specifies that file.
- --threads <n>#
Use n execution threads if it helps to speed up image operations. The default (also if n=0) is to use as many threads as there are cores present in the hardware.
- --cache <size>#
Causes images to be read through an ImageCache and set the underlying cache size (in MB). See Section ImageCache API.
- --oiioattrib <name> <value>#
Adds or replaces a global OpenImageIO attribute with the given name to have the specified value.
Optional appended modifiers include:
type=typename : Specify the metadata type.
If the optional
type=specifier is used, that provides an explicit type for the metadata. If not provided, it will try to infer the type of the metadata from the value: if the value contains only numerals (with optional leading minus sign), it will be saved asintmetadata; if it also contains a decimal point, it will be saved asfloatmetadata; otherwise, it will be saved as astringmetadata.Examples:
oiiotool --oiioattrib debug 1 in.jpg -o out.jpg
oiiotool commands for control flow#
- --set <name> <value>#
Adds or replaces a “user variable”. User variables may be referenced by name in expression substitution.
Optional appended modifiers include:
type=typename : Specify the metadata type.
If the optional
type=specifier is used, that provides an explicit type for the variable. If not provided, it will try to infer the type from the value: if the value contains only numerals (with optional leading minus sign), it will be saved asint; if it also contains a decimal point, it will be saved as afloat; otherwise, it will be saved as astring.This command was added in OIIO 2.4.0.
Examples:
$ oiiotool --set i 42 --echo "i = {i}"
i = 42
- --if <condition> true-cmds... --endif#
- --if <condition> true-cmds... --else false-cmds... --endif
If the condition is true, execute true-cmds, otherwise execute false-cmds.
The condition is considered false if it is integer 0 or float 0.0 or the empty string
"", or any of the stringsoff,false, orno(without regard to capitalization). All other values or strings are assumed to be considered “true” for the evaluation of the condition.Examples:
# Read in.exr, and if it only has 3 channels, add an alpha channel
# that is 1.0 everywhere, but if it already has 4 channels, leave
# it alone. Then output the result to out.exr.
$ oiiotool in.exr --if "{TOP.nchannels == 3}" --ch ,,,A=1.0 --endif -o rgba.exr
- --for <variable> <range> commands... --endfor#
Iterate a variable over a range, executing the commands for each iteration. The range may be one, two, or three numbers separated by commas, indicating
end : Iterate from 0 to end, incrementing by 1 each time.
- begin
,endIterate from begin to end, incrementing by 1 each time.
- begin
begin
,end,step : Iterate from begin to end, incrementing by step each time.
Note that the end value is “exclusive,” that is, the loop will terminate once the value is equal to end, and the loop body will not be executed for the end value.
Examples:
$ oiiotool --for i 5 --echo "i = {i}" --endfor
0
1
2
3
4

$ oiiotool --for i 5,10 --echo "i = {i}" --endfor
5
6
7
8
9

$ oiiotool --for i 5,10,2 --echo "i = {i}" --endfor
5
7
9
- --while <condition> commands... --endwhile#
If the condition is true, execute commands, and keep doing that until the condition is false.
The condition is considered false if it is integer 0 or float 0.0 or the empty string
"", or any of the stringsoff,false, orno(without regard to capitalization). All other values or strings are assumed to be considered “true” for the evaluation of the condition.Examples:
$ oiiotool -set i 0 --while "{i < 5}" --echo "i = {i}" -set i "{i + 1}" --endwhile
0
1
2
3
4
- --frames <seq>#
- --framepadding <n>#
Describes the frame range to substitute for the
#or%0Ndnumeric wildcards. The sequence is a comma-separated list of subsequences; each subsequence is a single frame (e.g.,100), a range of frames (100-150), or a frame range with step (100-150x4means100,104,108,...).The frame padding is the number of digits (with leading zeroes applied) that the frame numbers should have. It defaults to 4.
For example,
oiiotool –framepadding 3 –frames 3,4,10-20x2 blah.#.tif
would match
blah.003.tif,blah.004.tif,blah.010.tif,blah.012.tif,blah.014.tif,blah.016.tif,blah.018.tif,blah.020.tif.
- --views <name1,name2,...>#
Supplies a comma-separated list of view names (substituted for
%Vand%v). If not supplied, the view list will beleft,right.
- --skip-bad-frames#
When iterating over a frame range, if this option is used, any errors will cease processing that frame, but continue iterating with the next frame (rather than the default behavior of exiting immediately and not even attempting the other frames in the range).
- --parallel-frames#
When iterating over a frame range or views, if this option is used, the frames will run concurrently and not necessarily in any deterministic order.
Running the range of frames in parallel is helpful in cases where (a) there are enough frames in the range to make it be better to parallelize over the range rather than within each operation (rule of thumb: you should probably have at least as many frames to process as cores available); (b) it doesn’t matter what order the frames are processed in (e.g., no frames have a dependency on the computed results of earlier frames); and (c) you have enough memory and I/O bandwidth to handle all the parallel jobs (probably equal to the number of cores).
Without the
--parallel-framesoption, the frame range will be executed in increasing numerical order and each frame in the range will run to completion before the next one starts. Multithreading will be used for the individual operations done to each frame. This mode is less efficient if you have more frames than cores available, but it is guaranteed to be safe even if there are order or data dependencies between your frames, and itThis feature was added to OpenImageIO 2.5.1.
- --wildcardoff, --wildcardon#
These positional options turn off (or on) numeric wildcard expansion for subsequent command line arguments. This can be useful in selectively disabling numeric wildcard expansion for a subset of the command line.
- --evaloff, --evalon#
These positional options turn off (or on) expression evaluation (things with
{ }) for subsequent command line arguments. This can be useful in selectively disabling expression evaluation expansion for a subset of the command line, for example if you actually have filenames containing curly braces.
oiiotool commands: reading and writing images#
The commands described in this section read images, write images, or control the way that subsequent images will be written upon output.
Reading images#
- <filename>#
- -i <filename>#
If a command-line option is the name of an image file, that file will be read and will become the new current image, with the previous current image pushed onto the image stack.
The
-icommand may be used, which allows additional options that control the reading of just that one file.Optional appended modifiers include:
:now=intIf 1, read the image now, before proceeding to the next command.
:autocc=intEnable or disable
--autoccfor this input image (the default is to use the global setting).:unpremult=intIf autocc is used for this image, should any color transformation be done on unassociated colors (unpremultiplied by alpha). The default is 0.
:info=intPrint info about this file (even if the global
--infowas not used) if nonzero. If the value is 2, print full verbose info (like--info -v).:infoformat=nameWhen printing info, the format may be one of:
text(default) for readable text, orxmlfor an XML description of the image metadata.:type=nameUpon reading, convert the pixel data to the named type. This can override the default behavior of internally storing whatever type is the most precise one found in the file.
:ch=name…Causes the input to read only the specified channels. This is equivalent to following the input with a
--chcommand, except that by integrating into the-i, it potentially can avoid the I/O of the unneeded channels.
- --iconfig <name> <value>#
Sets configuration hint metadata that will apply to the next input file read. Input configuration hint settings are cleared after an image is read, and must be specified separately for every
-ior image filename to read.Optional appended modifiers include:
type=typename : Specify the metadata type.
If the optional
type=specifier is used, that provides an explicit type for the metadata. If not provided, it will try to infer the type of the metadata from the value: if the value contains only numerals (with optional leading minus sign), it will be saved asintmetadata; if it also contains a decimal point, it will be saved asfloatmetadata; otherwise, it will be saved as astringmetadata.Examples:
oiiotool --iconfig "oiio:UnassociatedAlpha" 1 in.png -o out.tif
Options that control the reading of all images#
These are all non-positional flags that affect how all images are read in the oiiotool command.
- --autocc#
Turns on automatic color space conversion: Every input image file will be immediately converted to a scene-referred linear color space, and every file written will be first transformed to an appropriate output color space based on the filename or type. Additionally, if the name of an output file contains a color space and that color space is associated with a particular data format, it will output that data format (akin to
-d).The rules for deducing color spaces are as follows, in order of priority:
If the filename (input or output) contains as a substring the name of a color space from the current OpenColorIO configuration, that will be assumed to be the color space of input data (or be the requested color space for output).
For input files, if the ImageInput set the
"oiio:ColorSpace"metadata, it will be honored if the filename did not override it.When outputting to JPEG files, assume that sRGB is the desired output color space (since JPEG requires sRGB), but still this only occurs if the filename does not specify something different.
If the implied color transformation is unknown (for example, involving a color space that is not recognized), a warning will be printed, but it the rest of
oiiotoolprocessing will proceed (but without having transformed the colors of the image).Optional appended modifiers include:
:unpremult=intIf nonzero, when autocc is performed on an image containing an alpha channel, the image will first be unpremultiplied by alpha, then color transformed, then re-premultipled by alpha, so that the color transformation is done with unassociated color values. The default is 0, meaning that the color transformation will be done directly on the associated color values.
Example:
If the input file
in_lg10.dpxis in thelg10color space, and you want to read it in, brighten the RGB uniformly by 10% (in a linear space, of course), and then save it as a 16 bit integer TIFF file encoded in thevd16color space, you could specify the conversions explicitly:oiiotool in_lg10.dpx --colorconvert lg10 linear \ --mulc 1.1,1.1,1.1,1.0 -colorconvert linear vd16 \ -d uint16 -o out_vd16.tif
or rely on the naming convention matching the OCIO color space names and use automatic conversion:
oiiotool --autocc in_lg10.dpx --mulc 1.1 -o out_vd16.tif
- --autopremult (default), -no-autopremult#
By default, OpenImageIO’s format readers convert any “unassociated alpha” (color values that are not “premultiplied” by alpha) to the usual associated/premultiplied convention. If the
--no-autopremultflag is found, subsequent inputs will not do this premultiplication. It can be turned on again via--autopremult.
- --autoorient#
Automatically do the equivalent of
--reorienton every image as it is read in, if it has a nonstandard orientation. This is generally a good idea to use if you are using oiiotool to combine images that may have different orientations.
- --native#
Normally, all images read by oiiotool are automatically converted to
floatpixels for internal storage (because any subsequent image processing is usually much faster and more accurate when done on floating-point values), and also if the--cacheoption is used, the reading and storage of images will be mediated through an ImageCache.The
--nativeoption causes input images to be stored internally in their native pixel data type of th file rather than converted to float. Also, even if the--cacheoption is used, reads will bypass the ImageCache (reading directly into an ImageBuf) if the pixel data type is not one of the types that is supported internally by ImageCache (UINT8,uint16,half, andfloat).There are three uses cases where
--nativemight be very helpful: (a) If you are using oiiotool merely for file format or data format conversion, with no actual image processing math performed on the pixel values – in that case, you might save time and memory by avoiding the conversion tofloat. (b) If you are reading exceptionally large images that have smaller data types thanfloat(for example,uint8pixels), and the only way to make the images fit in memory are to store them as uint8 rather than converting to float (which takes 4 times as much space in memory). (c) If you know the file has unusual pixel data types that might lose precision if converted tofloat(for example, if you have images withuint32ordoublepixels).
- --autotile <tilesize>#
For the underlying ImageCache, turn on auto-tiling with the given tile size. Setting tilesize to 0 turns off auto-tiling (the default is off). If auto-tile is turned on, The ImageCache “autoscanline” feature will also be enabled. See Section ImageCache API for details.
- --missingfile <value>#
Determines the behavior when an input file is not found, and no file of that name exists at all. An error is always printed and the
oiiotoolprogram always has an error-indicating exit code. But how it proceeds with the rest of the commands may vary depending on the option value:error: (default) Consider it a full error for that frame iteration.black: After the error is printed, try to continue with the rest of the command, substituting an opaque black image for the missing file.checkerAfter the error is printed, try to continue with the restof the command, substituting a checkerboard image for the missing file.
Note that the resolution, channels, and format (but not arbitrary metadata) of the missing file substution image will be the same as the first image that was successfully read. If the first image requested is missing (thus, nothing had been successfully read when the missing image is needed), it will be HD resolution, 1920x1080, RGBA.
- --info#
Print metadata information about each input image as it is read. If verbose mode is turned on (
-v), all the metadata for the image is printed. If verbose mode is not turned on, only the resolution and data format are printed.Optional appended modifiers include:
format=name: The format name may be one of:text(default) for readable text, orxmlfor an XML description of the image metadata.verbose=1: If nonzero, the information will contain all metadata, not just the minimal amount.
Note that this is a non-positional flag that will cause metadata to be printed for every input file. There is a separate
--printinfoaction that immediately prints metadata about the current image at the top of the stack (see oiiotool commands that print information about the current image).
- --metamatch <regex>, --no-metamatch <regex>#
Regular expressions to restrict which metadata are output when using
oiiotool --info -v. The--metamatchexpression causes only metadata whose name matches to print; non-matches are not output. The--no-metamatchexpression causes metadata whose name matches to be suppressed; others (non-matches) are printed. It is not advised to use both of these options at the same time (probably nothing bad will happen, but it’s hard to reason about the behavior in that case).
- --stats#
Print detailed statistical information about each input image as it is read.
Note that this is a non-positional flag that will cause statistics to be printed for every input file. There is a separate
--printstatsaction that immediately prints statistics about the current image at the top of the stack (see oiiotool commands that print information about the current image).
- --hash#
Print the SHA-1 hash of the pixels of each input image as it is read.
- --dumpdata#
Print to the console the numerical values of every pixel, for each input image as it is read.
Optional appended modifiers include:
C=name : If present, will cause the output of the data to be in the correct syntax of declaring a C array with the given name. (This was added in OpenImageIO v2.3.9.)empty=verbose : If 0, will cause deep images to skip printing of information about pixels with no samples.
Examples:
$ oiiotool --dumpdata image.exr
image.exr       :  256 x  256, 4 channel, float openexr
    Pixel (0, 0): 0.517036676 0.261921108 0.017822538 0.912108004
    Pixel (1, 0): 0.653315008 0.527794302 0.359594107 0.277836263
    ...

$ oiiotool --dumpdata:C=foo image.exr
// image.exr       :  256 x  256, 4 channel, float openexr
float foo[256][256][4] =
{
    /* (0, 0): */ { 0.517036676, 0.261921108, 0.017822538, 0.912108004 },
    /* (1, 0): */ { 0.653315008, 0.527794302, 0.359594107, 0.277836263 },
    ...
};
Writing images#
- -o <filename>#
Outputs the current image to the named file. This does not remove the current image from the image stack, it merely saves a copy of it.
Optional appended modifiers include:
:type=nameSet the pixel data type (like
-d) for this output image (e.g.,uint8,uint16,half,float, etc.).:bits=intSet the bits per pixel (if nonstandard for the datatype) for this output image.
:dither=intTurn dither on or off for this output. When writing floating point data to an 8 bit or less data type in the file, dither can reduce banding artifacts. (default: 0)
:autocc=intEnable or disable
--autoccfor this output image (the default is to use the global setting).:unpremult=intIf autocc is used for this image, should any color transformation be done on unassociated colors (unpremultiplied by alpha). The default is 0.
:autocrop=intEnable or disable autocrop for this output image.
:autotrim=intEnable or disable
--autotrimfor this output image.:separate=int,contig=intSet separate or contiguous planar configuration for this output.
:fileformatname=stringSpecify the desired output file format, overriding any guess based on file name extension.
:scanline=intIf nonzero, force scanline output.
:tile=intxintForce tiling with given size.
:all=nOutput all images currently on the stack using a pattern. See further explanation below.
The
all=noption causes all images on the image stack to be output, with the filename argument used as a pattern assumed to contain a%d, which will be substituted with the index of the image (beginning with n). For example, to take a multi-image TIFF and extract all the subimages and save them as separate files:oiiotool multi.tif -sisplit -o:all=1 sub%04d.tif
This will output the subimges as separate files
sub0001.tif,sub0002.tif, and so on.
- -otex <filename>#
- -oenv <filename>#
- -obump <filename>#
Outputs the current image to the named file, as a MIP-mapped texture or environment map, identical to that which would be output by
maketx(Chapter Making Tiled MIP-Map Texture Files With maketx or oiiotool). The advantage of using oiiotool rather thanmaketxis simply that you can have a complex oiiotool command line sequence of image operations, culminating in a direct saving of the results as a texture map, rather than saving to a temporary file and then separately invokingmaketx.In addition to all the optional arguments of
-o, optional appended arguments for-otex,-oenv, and-obumpalso include::wrap=stringSet the default $s$ and $t$ wrap modes of the texture, to one of:
:black,clamp,periodic,mirror.:swrap=stringSet the default $s$ wrap mode of the texture.
:twrap=stringSet the default $t$ wrap mode of the texture.
:resize=intIf nonzero, resize to a power of 2 before starting to create the MIPpmap levels. (default: 0)
:nomipmap=intIf nonzero, do not create MIP-map levels at all. (default: 0)
:updatemode=intIf nonzero, do not create and overwrite the existing texture if it appears to already match the source pixels. (default: 0)
:constant_color_detect=intDetect images that are entirely one color, and change them to be low resolution. (default: 0)
:monochrome_detect=intDetect monochrome (R=G=B) images and turn them into 1-channel textures. (default: 0)
:opaque_detect=intDetect opaque (A=1) images and drop the alpha channel from the texture. (default: 0)
:compute_average=intCompute and store the average color of the texture. (default: 1)
:unpremult=intUnpremultiply colors before any per-MIP-level color conversions, and re-premultiply after. (default: 0)
:incolorspace=stringSpecify color space conversion.
:outcolorspace=string…
:highlightcomp=intUse highlight compensation for HDR images when resizing for MIP-map levels. (default: 0)
:sharpen=floatAdditional sharpening factor when resizing for MIP-map levels. (default: 0.0)
:filter=stringSpecify the filter for MIP-map level resizing. (default: box)
:prman_metadata=intTurn all all options required to make the resulting texture file compatible with PRMan (particular tile sizes, formats, options, and metadata). (default: 0)
:prman_options=intInclude the metadata that PRMan’s texture system wants. (default: 0)
:bumpformat=stringFor
-obumponly, specifies the interpretation of 3-channel source images as one of:height,normal,auto(default).:uvslopes_scale=floatFor
-obumponly, specifies the amount to scale the bump-map slopes by. (default: 0.0, meaning not to use this feature):cdf=intIf nonzero, will add to the texture metadata the forward and inverse Gaussian CDF, which can be used by shaders to implement Histogram-Preserving blending. (default: 0)
:cdfsigma=floatIn conjunction with
cdf=1, specifies the sigma value to use for the CDF (default: 1.0/6.0).:cdfbits=intIn conjunction with
cdf=1, specifies the number of bits to use for the size of the CDF table (default: 8, meaning 256 bins).:handed=stringSpecifies the handedness of a vector displacement map or normal map when using tangent space coordinates. Valid values are “left” or “right” (default: none).
Examples:
oiiotool in.tif -otex out.tx

oiiotool in.jpg --colorconvert sRGB linear -d uint16 -otex out.tx

oiiotool --pattern:checker 512x512 3 -d uint8 -otex:wrap=periodic checker.tx

oiiotool in.exr -otex:hilightcomp=1:sharpen=0.5 out.exr
- -d <datatype>#
- -d <channelname>=<datatype>
- -d <subimagename>.*=<datatype>
- -d <subimagename>.<channelname>=<datatype>
Attempts to set the pixel data type of all subsequent outputs. If no channel or subimage name is given, sets all channels to be the specified data type. If a specific channel is named, then the data type will be overridden for just that channel (multiple
-dcommands may be used). If both a subimage name and channel name are specified, the hint is only for the named channel when encountered in a named subimage. And if the specification is of the formsubimagename.*=type, then all channels of that subimage will be output with the given type.Valid types are:
uint8,sint8,uint16,sint16,half,float,double. The typesuint10anduint12may be used to request 10- or 12-bit unsigned integers. If the output file format does not support them,uint16will be substituted.If the
-doption is not supplied, the output data type will be deduced from the data format of the input files, if possible.In any case, if the output file type does not support the requested data type, it will instead use whichever supported data type results in the least amount of precision lost.
- --scanline#
Requests that subsequent output files be scanline-oriented, if scanline orientation is supported by the output file format. By default, the output file will be scanline if the input is scanline, or tiled if the input is tiled.
- --tile <x> <y>#
Requests that subsequent output files be tiled, with the given \(x \times y\) tile size, if tiled images are supported by the output format. By default, the output file will take on the tiledness and tile size of the input file.
- --compression <method>#
- --compression <method:quality>
Sets the compression method, and optionally a quality setting, for the output image. Each ImageOutput plugin will have its own set of methods that it supports.
Sets the compression method, and optionally a quality setting, for the output image. Each ImageOutput plugin will have its own set of methods that it supports.
- --quality <q>#
Sets the compression quality, on a 1-100 floating-point scale. This only has an effect if the particular compression method supports a quality metric (as JPEG does).
This is considered deprecated, and in general we now recommend just appending the quality metric to the
--compression name:qual.
- --dither#
Turns on dither when outputting to 8-bit or less image files (does not affect other data types). This adds just a bit of noise that reduces visible banding artifacts. The dither seed will be selected based on a hash of the output filename, and therefore will be a different random pattern for different files. It only has an effect when outputting to a file of 8 or fewer bits per sample, and only when the data being saved starts off with higher than 8 bit precision.
- --planarconfig <config>#
Sets the planar configuration of subsequent outputs (if supported by their formats). Valid choices are:
configfor contiguous (or interleaved) packing of channels in the file (e.g., RGBRGBRGB…),separatefor separate channel planes (e.g., RRRR…GGGG…BBBB…), ordefaultfor the default choice for the given format. This command will be ignored for output files whose file format does not support the given choice.
- --adjust-time#
When this flag is present, after writing each output, the resulting file’s modification time will be adjusted to match any
"DateTime"metadata in the image. After doing this, a directory listing will show file times that match when the original image was created or captured, rather than simply when oiiotool was run. This has no effect on image files that don’t contain any"DateTime"metadata.
- --noautocrop#
For subsequent outputs, do not automatically crop images whose formats don’t support separate pixel data and full/display windows. Without this, the default is that outputs will be cropped or padded with black as necessary when written to formats that don’t support the concepts of pixel data windows and full/display windows. This is a non-issue for file formats that support these concepts, such as OpenEXR.
- --autotrim#
For subsequent outputs, if the output format supports separate pixel data and full/display windows, automatically trim the output so that it writes the minimal data window that contains all the non-zero valued pixels. In other words, trim off any all-black border rows and columns before writing the file.
- --metamerge#
When this flag is used, most image operations will try to merge the metadata found in all of their source input images into the output. The default (if this is not used) is that image oprations with multiple input images will just take metadata from the first source image.
(This was added for OpenImageIO 2.1.)
oiiotool commands that print information about the current image#
- --echo <message>#
Prints the message to the console, at that point in the left-to-right execution of command line arguments. The message may contain expressions for substitution.
Optional appended modifiers include:
newline=n: The number of newlines to print after the message (default is 1, but 0 will suppress the newline, and a larger number will make more vertical space.
Examples:
oiiotool test.tif --resize 256x0 --echo "result is {TOP.width}x{TOP.height}"
This will resize the input to be 256 pixels wide and automatically size it vertically to preserve the original aspect ratio, and then print a message to the console revealing the resolution of the resulting image.
- --list-formats#
Prints the complete list of file formats supported by this build of OpenImageIO, and for each one, the list of file extensions that it presumes are associated with the file format. (Added in OIIO 2.2.13.)
- --printinfo#
Prints information and all metadata about the current (top) image. This behavior is similar to invoking oiiotool with
--info -v, but it applies immediately to the current top image, even if it is a “computed” image (whereas--infoonly applies to images as they are read from disk).Optional appended modifiers include:
:allsubimages=intIf nonzero, stats will be printed about all subimages of the current image. (The default is given by whether or not the
-aoption was used.)
:native=1Print metadata reflecting the “native” image as it was originally read from disk. This may have a data type, tile size, or other items that differ from the current in-memory representation of the image.
:stats=1Print statistics about the image (much like the
--statscommand).
:verbose=0Overrides the default verbosity (1, on) with a less verbose output.
- --printstats#
Prints detailed statistical information about the current image. This behavior is similar to invoking oiiotool with
--stats, but it applies immediately to the current top image, even if it is a “computed” image (whereas--statsonly applies to images as they are read from disk).Optional appended modifiers include:
:window=geomIf present, restricts the statistics to a rectangular subset of the image. The default, if not present is to print the statistics of the full data window of the image. The rectangle can be specified using either of these image geometry notations:
width x height [+-] xoffset [+-] yoffset
xmin,ymin,xmax,ymax
:allsubimages=intIf nonzero, stats will be printed about all subimages of the current image. (The default is given by whether or not the
-aoption was used.)
- --colorcount r1,g1,b1,...:r2,g2,b2,...:...#
Given a list of colors separated by colons or semicolons, where each color is a list of comma-separated values (for each channel), examine all pixels of the current image and print a short report of how many pixels matched each of the colors.
Optional appended modifiers include:
eps=r,g,b,...: Tolerance for matching colors (default: 0.001 for all channels).
Examples:
oiiotool test.tif --colorcount "0.792,0,0,1;0.722,0,0,1"
might produce the following output:
10290  0.792,0,0,1
11281  0.722,0,0,1
Notice that use of double quotes
" "around the list of color arguments, in order to make sure that the command shell does not interpret the semicolon (;) as a statement separator. An alternate way to specify multiple colors is to separate them with a colon (:), for example:oiiotool test.tif --colorcount 0.792,0,0,1:0.722,0,0,1
Another example:
oiiotool test.tif --colorcount:eps=.01,.01,.01,1000 "0.792,0,0,1"
This example sets a larger epsilon for the R, G, and B channels (so that, for example, a pixel with value [0.795,0,0] would also match), and by setting the epsilon to 1000 for the alpha channel, it effectively ensures that alpha will not be considered in the matching of pixels to the color value.
- --rangecheck Rlow,Glow,Blow,... Rhi,Bhi,Ghi,...#
Given a two colors (each a comma-separated list of values for each channel), print a count of the number of pixels in the image that has channel values outside the [low,hi] range. Any channels not specified will assume a low of 0.0 and high of 1.0.
Example:
oiiotool test.exr --rangecheck 0,0,0 1,1,1
might produce the following output:
    0  < 0,0,0
  221  > 1,1,1
65315  within range
- --diff#
- --fail <A> --failpercent <B> --hardfail <C>#
- --warn <A> --warnpercent <B> --hardwarn <C>#
This command computes the difference of the current image and the next image on the stack, and prints a report of those differences (how many pixels differed, the maximum amount, etc.). This command does not alter the image stack.
The
--fail,--failpercent, and--hardfailoptions set thresholds forFAILURE: if more than B % of pixels (on a 0-100 floating point scale) are greater than A different, or if any pixels are more than C different. The defaults are to fail if more than 0% (any) pixels differ by more than 0.00001 (1e-6), and C is infinite.The
--warn,--warnpercent, andhardwarnoptions set thresholds forWARNING: if more than B % of pixels (on a 0-100 floating point scale) are greater than A different, or if any pixels are more than C different. The defaults are to warn if more than 0% (any) pixels differ by more than 0.00001 (1e-6), and C is infinite.
- --pdiff#
This command computes the difference of the current image and the next image on the stack using a perceptual metric, and prints whether or not they match according to that metric. This command does not alter the image stack.
oiiotool commands that change the current image metadata#
This section describes oiiotool commands that alter the metadata of the current image, but do not alter its pixel values. Only the current (i.e., top of stack) image is affected, not any images further down the stack.
If the -a flag has previously been set, these commands apply to all
subimages or MIPmap levels of the current top image. Otherwise, they only
apply to the highest-resolution MIPmap level of the first subimage of the
current top image.
- --attrib <name> <value>#
- --sattrib <name> <value>#
Adds or replaces metadata with the given name to have the specified value.
Optional appended modifiers include:
:subimages=indices-or-namesInclude/exclude subimages (see Dealing with multi-subimage/multi-part files). Only included subimages will have the attribute changed. If subimages are not set, only the first subimage will be changed, or all subimages if the
-acommand line flag was used.
:type=typename : Specify the metadata type.If the optional
type=specifier is used, that provides an explicit type for the metadata. If not provided, it will try to infer the type of the metadata from the value: if the value contains only numerals (with optional leading minus sign), it will be saved asintmetadata; if it also contains a decimal point, it will be saved asfloatmetadata; otherwise, it will be saved as astringmetadata.The
--sattribcommand is equivalent to--attrib:type=string.Examples:
# Set the IPTC:City attribute to "Berkeley"
oiiotool in.jpg --attrib "IPTC:City" "Berkeley" -o out.jpg

# Set a name attribute to "0", but force it to be a string
oiiotool in.jpg --attrib:type=string "Name" "0" -o out.jpg

# Another way to force a string attribute using --sattrib:
oiiotool in.jpg --sattrib "Name" "0" -o out.jpg

# Set the worldcam attribute to be a matrix
oiiotool in.exr --attrib:type=matrix worldtocam \
        "1,0,0,0,0,1,0,0,0,0,1,0,2.3,2.1,0,1" -o out.exr

# Set an attribute to be a timecode
oiiotool in.exr --attrib:type=timecode smpte:TimeCode "11:34:04:00" -o out.exr

# Set an attribute in all subimages
oiiotool multipart.exr --attrib:subimages=all "Foo" "bar" -o out.exr

# Set an attribute just in subimages 0 and 3
oiiotool multipart.exr --attrib:subimages=0,3 "Foo" "bar" -o out.exr
- --caption <text>#
Sets the image metadata
"ImageDescription". This has no effect if the output image format does not support some kind of title, caption, or description metadata field. Be careful to enclose text in quotes if you want your caption to include spaces or certain punctuation!Optional appended modifiers include:
:subimages=indices-or-namesInclude/exclude subimages (see Dealing with multi-subimage/multi-part files). Only included subimages will have the attribute changed. If subimages are not set, only the first subimage will be changed, or all subimages if the
-acommand line flag was used.
- --keyword <text>#
Adds a keyword to the image metadata
"Keywords". Any existing keywords will be preserved, not replaced, and the new keyword will not be added if it is an exact duplicate of existing keywords. This has no effect if the output image format does not support some kind of keyword field.Be careful to enclose text in quotes if you want your keyword to include spaces or certain punctuation. For image formats that have only a single field for keywords, OpenImageIO will concatenate the keywords, separated by semicolon (
;), so don’t use semicolons within your keywords.
- --clear-keywords#
Clears all existing keywords in the current image.
Optional appended modifiers include:
:subimages=indices-or-namesInclude/exclude subimages (see Dealing with multi-subimage/multi-part files). Only included subimages will have the attribute changed. If subimages are not set, only the first subimage will be changed, or all subimages if the
-acommand line flag was used.
- --nosoftwareattrib#
When set, this prevents the normal adjustment of “Software” and “ImageHistory” metadata to reflect what oiiotool is doing.
- --sansattrib#
When set, this edits the command line inserted in the “Software” and “ImageHistory” metadata to omit any verbose
--attriband--sattribcommands.
- --eraseattrib <pattern>#
Removes any metadata whose name matches the regular expression pattern. The pattern will be case insensitive.
Optional appended modifiers include:
:subimages=indices-or-namesInclude/exclude subimages (see Dealing with multi-subimage/multi-part files). Only included subimages will have the attribute changed. If subimages are not set, only the first subimage will be changed, or all subimages if the
-acommand line flag was used.
Examples:
# Remove one item only
oiiotool in.jpg --eraseattrib "smpte:TimeCode" -o no_timecode.jpg

# Remove all GPS tags
oiiotool in.jpg --eraseattrib "GPS:.*" -o no_gps_metadata.jpg

# Remove all metadata
oiiotool in.exr --eraseattrib:subimages=all ".*" -o no_metadata.exr
- --orientation <orient>#
Explicitly sets the image’s
"Orientation"metadata to a numeric value (see Section Display hints for the numeric codes). This only changes the metadata field that specifies how the image should be displayed, it does NOT alter the pixels themselves, and so has no effect for image formats that don’t support some kind of orientation metadata.Optional appended modifiers include:
:subimages=indices-or-namesInclude/exclude subimages (see Dealing with multi-subimage/multi-part files). Only included subimages will have the attribute changed. If subimages are not set, only the first subimage will be changed, or all subimages if the
-acommand line flag was used.
- --orientcw#
- --orientccw#
- --orient180#
Adjusts the image’s
"Orientation"metadata by rotating the suggested viewing orientation \(90^\circ\) clockwise, \(90^\circ\) degrees counter-clockwise, or \(180^\circ\), respectively, compared to its current setting. This only changes the metadata field that specifies how the image should be displayed, it does NOT alter the pixels themselves, and so has no effect for image formats that don’t support some kind of orientation metadata.See the
--rotate90,--rotate180,--rotate270, and--reorientcommands for true rotation of the pixels (not just the metadata).
- --origin <neworigin>#
Set the pixel data window origin, essentially translating the existing pixel data window to a different position on the image plane. The new data origin is in the form:
[+-]x[+-]y
Examples:
--origin +20+10           x=20, y=10
--origin +0-40            x=0, y=-40
- --originoffset <offset>#
Alter the data window origin, translating the existing pixel data window by this relative amount. The offset is in the form:
[+-]x[+-]y
Examples:
# Assuming the old origin was +100+20...
--originoffset +20+10           # new x=120, y=30
--originoffset +0-40            # new x=100, y=-20
- --fullsize <size>#
Set the display/full window size and/or offset. The size is in the form
width x height [+-] xoffset [+-] yoffset
If either the offset or resolution is omitted, it will remain unchanged.
Examples:
--fullsize 1920x1080resolution w=1920, h=1080, offset unchanged
--fullsize -20-30resolution unchanged, x=-20, y=-30
--fullsize 1024x768+100+0resolution w=1024, h=768, offset x=100, y=0
- --fullpixels#
Set the full/display window range to exactly cover the pixel data window.
- --chnames <name-list>#
Rename some or all of the channels of the top image to the given comma-separated list. Any completely empty channel names in the list will not be changed. For example:
oiiotool in.exr --chnames ",,,A,Z" -o out.exr
will rename channel 3 to be “A” and channel 4 to be “Z”, but will leave channels 0–3 with their old names.
Optional appended modifiers include:
:subimages=indices-or-namesInclude/exclude subimages (see Dealing with multi-subimage/multi-part files). Only included subimages will have their channels renamed.
oiiotool commands that shuffle channels or subimages#
- --selectmip <level>#
If the current image is MIP-mapped, replace the current image with a new image consisting of only the given level of the MIPmap. Level 0 is the highest resolution version, level 1 is the next-lower resolution version, etc.
- --unmip#
If the current image is MIP-mapped, discard all but the top level (i.e., replacing the current image with a new image consisting of only the highest-resolution level). Note that this is equivalent to
--selectmip
0
.
- --subimage <n>#
If the current image has multiple subimages, replace it with just the specified subimage. The subimage specifier n is either an integer giving the index of the subimage to extract (starting with 0), or the name of the subimage to extract (comparing to the
"oiio:subimagename"metadata).Additionally, this command can be used to remove one subimage (leaving the others) by using the optional modifier
--subimage:delete=1.
- --sisplit#
Remove the top image from the stack, split it into its constituent subimages, and push them all onto the stack (first to last).
- --siappend#
Replaces the top two (or more) images on the stack with a single new multi-subimage comprised of the original images appended together as subimages within the same single image.
Optional appended modifiers include:
:n=number-of-subimagesSpecify the number (if more than 2) of images to combine into a single multi-subimage image. This will be clamped between 2 and the total number of images on the stack.
- --siappendall#
Replace all of the individual images on the stack with a single new image comprised of the subimages of all original images appended together.
- --ch <channellist>#
Replaces the top image with a new image whose channels have been reordered as given by the channellist. The
channellistis a comma-separated list of channel designations, each of which may bean integer channel index of the channel to copy,
the name of a channel to copy,
newname
=oldname, which copies a named channel and also renames it,=float, which will set the channel to a constant value, ornewname
=float, which sets the channel to a constant value as well as names the new channel.
Example channel lists include:
R,G,B,R=0.0,G,B,A=1.0,R=B,G,B=R,4,5,6,A.Channel numbers outside the valid range of input channels, or unknown names, will be replaced by black channels. If the channellist is shorter than the number of channels in the source image, unspecified channels will be omitted.
If the channel list does not specify any changes (neither order, nor name, nor value), then this will just leave the images as-is, without any unnecessary expense or pointless copying of images in memory.
- --chappend#
Replaces the top two (or more) images on the stack with a single new image comprised of the channels of the input images appended together.
Optional appended modifiers include:
:n=number-of-subimagesSpecify the number (if more than 2) of images whose channels should be combined into a single image. This will be clamped between 2 and the total number of images on the stack.
:subimages=indices-or-namesInclude/exclude subimages (see Dealing with multi-subimage/multi-part files).
oiiotool commands that adjust the image stack#
- --pop#
Pop the image stack, discarding the current image and thereby making the next image on the stack into the new current image.
- --dup#
Duplicate the current image and push the duplicate on the stack. Note that this results in both the current and the next image on the stack being identical copies.
- --swap#
Swap the current image and the next one on the stack.
- --label <name>#
Gives a name to (and saves) the current image at the top of the stack. Thereafter, the label name may be used to refer to that saved image, in the usual manner that an ordinary input image would be specified by filename.
oiiotool commands that make entirely new images#
- --create <size> <channels>#
Create new black image with the given size and number of channels, pushing it onto the image stack and making it the new current image.
The size is in the form
width x height [+-] xoffset [+-] yoffset
If the offset is omitted, it will be x=0, y=0. Optional appended arguments include:
type=name : Create the image in memory with the named data type (default: float).
Examples:
--create 1920x1080 3         # RGB with w=1920, h=1080, x=0, y=0
--create 1024x768+100+0 4    # RGBA with w=1024, h=768, x=100, y=0
--create:type=uint8 1920x1080 3  # RGB, store internally as uint8
- --pattern <patternname> <size> <channels>#
Create new image with the given size and number of channels, initialize its pixels to the named pattern, and push it onto the image stack to make it the new current image.
The size is in the form
width x height [+-] xoffset [+-] yoffset
If the offset is omitted, it will be x=0, y=0. Optional appended arguments include:
type=name : Create the image in memory with the named data type (default: float).
The patterns recognized include the following:
black: A black image (all pixels 0.0)constant: A constant color image, defaulting to white, but the color can be set with the optional:color=r,g,b,...arguments giving a numerical value for each channel.checker: A black and white checkerboard pattern. The optional modifier:width=sets the width of the checkers (defaulting to 8 pixels),:height=sets the height of the checkers (defaulting to equal height and width). Optional modifiers:color1=r,g,b,...and:color2=r,g,b,...set the colors of the alternating squares (defaulting to black and white, respectively).fill: A constant color or gradient, depending on the optional colors. Argument:color=r,g,b,...results in a constant color. Argument:top=r,g,b,...:bottom=...results in a top-to-bottom gradient. Argument:left=r,g,b,...:right=...results in a left-to-right gradient. Argument:topleft=r,g,b,...:topright=...:bottomleft=...:bottomright=...results in a 4-corner bilinear gradient.noise: Create a noise image, with the option:type=specifying the kind of noise: (1)gaussian(default) for normal distribution noise with mean and standard deviation given by:mean=and:stddev=, respectively (defaulting to 0 and 0.1); (2)white(oruniform) for uniformly-distributed white noise over the range of values given by options:min=and:max=(defaults: 0 and 0.1); (3)bluefor uniformly-distributed blue noise over the range of values given by options:min=and:max=(defaults: 0 and 0.1); (4)saltfor “salt and pepper” noise where a portion of pixels given by optionportion=(default: 0.1) is replaced with value given by optionvalue=(default: 0). For any of these noise types, the optionseed=can be used to change the random number seed andmono=1can be used to make monochromatic noise (same value in all channels).
Examples:
A constant 4-channel, 640x480 image with all pixels (0.5, 0.5, 0.1, 1):
--pattern constant:color=0.3,0.5,0.1,1.0 640x480 4
A 256x256 RGB image with a 16-pixel-wide checker pattern:
--pattern checker:width=16:height=16 256x256 3
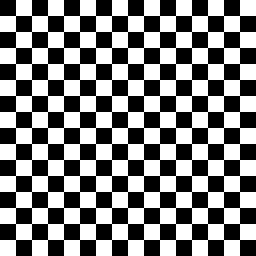
Horizontal, vertical, or 4-corner gradients:
--pattern fill:top=0.1,0.1,0.1:bottom=0,0,0.5 640x480 3
--pattern fill:left=0.1,0.1,0.1:right=0,0.75,0 640x480 3
--pattern fill:topleft=.1,.1,.1:topright=1,0,0:bottomleft=0,1,0:botromright=0,0,1 640x480 3



The first example puts uniform noise independently in 3 channels, while the second generates a single greyscale noise and replicates it in all channels.
oiiotool --pattern noise:type=uniform:min=1:max=1 256x256 3 -o colornoise.jpg
oiiotool --pattern noise:type=uniform:min=0:max=1:mono=1 256x256 3 -o greynoise.jpg}
Generate Gaussian noise with mean 0.5 and standard deviation 0.2 for each channel:
oiiotool --pattern noise:type=gaussian:mean=0.5:stddev=0.2 256x256 3 -o gaussnoise.jpg
- --kernel <name> <size>#
Create new 1-channel
floatimage big enough to hold the named kernel and size (size is expressed as width x height, e.g.5x5). The width and height are allowed to be floating-point numbers. The kernel image will have its origin offset so that the kernel center is at (0,0), and and will be normalized (the sum of all pixel values will be 1.0).Kernel names can be:
gaussian,sharp-gaussian,box,triangle,blackman-harris,mitchell,b-spline,cubic,keys,simon,rifman,disk. There are alsocatmull-romandlanczos3(and its synonym,nuke-lanczos6), but they are fixed-size kernels that don’t scale with the width, and are therefore probably less useful in most cases.Examples:
oiiotool --kernel gaussian 11x11 -o gaussian.exr
- --capture#
Capture a frame from a camera device, pushing it onto the image stack and making it the new current image. Optional appended arguments include:
camera=num : Select which camera number to capture (default: 0).
Examples:
--capture               # Capture from the default camera
--capture:camera=1      # Capture from camera #1
oiiotool commands that do image processing#
- --add#
- --addc <value>#
- --addc <value0,value1,value2...>
Replace the two top images with a new image that is the pixel-by-pixel sum of those images (
--add), or add a constant color value to all pixels in the top image (--addc).For
--addc, if a single constant value is given, it will be added to all color channels. Alternatively, a series of comma-separated constant values (with no spaces!) may be used to specify a different value to add to each channel in the image.Optional appended modifiers include:
:subimages=indices-or-namesInclude/exclude subimages (see Dealing with multi-subimage/multi-part files).
Examples:
oiiotool imageA.tif imageB.tif --add -o sum.jpg
oiiotool tahoe.jpg --addc 0.5 -o addc.jpg
- --sub#
- --subc <value>#
- --subc <value0,value1,value2...>
Replace the two top images with a new image that is the pixel-by-pixel difference between the first and second images (
--sub), or subtract a constant color value from all pixels in the top image (--subc).For
--subc, if a single constant value is given, it will be subtracted from all color channels. Alternatively, a series of comma-separated constant values (with no spaces!) may be used to specify a different value to subtract from each channel in the image.Optional appended modifiers include:
:subimages=indices-or-namesInclude/exclude subimages (see Dealing with multi-subimage/multi-part files).
- --mul#
- --mulc <value>#
- --mulc <value0,value1,value2...>
Replace the two top images with a new image that is the pixel-by-pixel multiplicative product of those images (
--mul), or multiply all pixels in the top image by a constant value (--mulc).For
--mulc, if a single constant value is given, it will be multiplied to all color channels. Alternatively, a series of comma-separated constant values (with no spaces!) may be used to specify a different value to multiply with each channel in the image.Optional appended modifiers include:
:subimages=indices-or-namesInclude/exclude subimages (see Dealing with multi-subimage/multi-part files).
Example:
# Scale image brightness to 20% of its original
oiiotool tahoe.jpg --mulc 0.2 -o mulc.jpg
- --div#
- --divc <value>#
- --divc <value0,value1,value2...>
Replace the two top images with a new image that is the pixel-by-pixel, channel-by-channel result of the first image divided by the second image (
--div), or divide all pixels in the top image by a constant value (--divc). Division by zero is defined as resulting in 0.For
--divc, if a single constant value is given, all color channels will have their values divided by the same value. Alternatively, a series of comma-separated constant values (with no spaces!) may be used to specify a different multiplier for each channel in the image, respectively.Optional appended modifiers include:
:subimages=indices-or-namesInclude/exclude subimages (see Dealing with multi-subimage/multi-part files).
- --mad#
Replace the three top images A, B, and C (C being the top of stack, B below it, and A below B), and compute
A*B+C, placing the result on the stack. Note thatA B C --madis equivalent toA B --mul C --add, though using--madmay be somewhat faster and preserve more precision.Optional appended modifiers include:
:subimages=indices-or-namesInclude/exclude subimages (see Dealing with multi-subimage/multi-part files).
- --invert#
Replace the top image with its color inverse. By default, it only inverts the first three channels in order to preserve alpha, but you can override the channel range of the inversion with optional modifiers
chbeginandchend. Channels outside this range will simply be copied, without inversion.Optional appended modifiers include:
:chbegin=intOverride the beginning of the range of channels to be inverted (defaults to 0.)
:chend=intOverride the end of the range of channels to be inverted (defaults to 3). Remember that this is one more than the index of the last channel to be inverted.
:subimages=indices-or-namesInclude/exclude subimages (see Dealing with multi-subimage/multi-part files).
Example:
oiiotool tahoe.jpg --inverse -o inverse.jpg
- --absdiff#
- --absdiffc <value>#
- --absdiffc <value0,value1,value2...>
Replace the two top images with a new image that is the absolute value of the difference between the first and second images (
--absdiff), or replace the top image by the absolute value of the difference between each pixel and a constant color (--absdiffc).Optional appended modifiers include:
:subimages=indices-or-namesInclude/exclude subimages (see Dealing with multi-subimage/multi-part files).
- --abs#
Replace the current image with a new image that has each pixel consisting of the absolute value of the old pixel value.
Optional appended modifiers include:
:subimages=indices-or-namesInclude/exclude subimages (see Dealing with multi-subimage/multi-part files).
- --powc <value>#
- --powc <value0,value1,value2...>
Raise all the pixel values in the top image to a constant power value. If a single constant value is given, all color channels will have their values raised to this power. Alternatively, a series of comma-separated constant values (with no spaces!) may be used to specify a different exponent for each channel in the image, respectively.
Optional appended modifiers include:
:subimages=indices-or-namesInclude/exclude subimages (see Dealing with multi-subimage/multi-part files).
- --normalize#
Normalize the top image. Assuming the first three channels represent a 3D vector, divide each pixel by its length to make it unit length. This function assumes a 3-channel image that represents a 3-vector, or a 4-channel image that represents a 3-vector plus an alpha value. If an alpha channel is present, its value is merely copied, and is not part of the normalization computation.
Optional appended modifiers include:
:incenter=floatThe pixel value that corresponds to a 0.0 vector value for the input. (default: 0.0)
:outcenter=floatThe pixel value that corresponds to a 0.0 vector value for the output. (default: 0.0)
:scale=floatThe desired length of the output vectors. (default: 1.0)
Example:
# Normalize a floating point image containing vector values:
oiiotool xyzvectors.exr --normalize -o normalized.exr

# Normalize an unsigned integer image where [-1,1] vector values
# are encoded on [0,1] for both input and output:
oiiotool xyzvectors.tif --normalize:incenter=0.5:outcenter=0.5:scale=0.5 -o normalized.tif
- --noise#
Alter the top image to introduce noise, with the option
:type=specifying the kind of noise: (1)gaussian(default) for normal distribution noise with mean and standard deviation given by:mean=and:stddev=, respectively (defaulting to 0 and 0.1); (2)white(oruniform) for uniformly-distributed independent noise over the range of values given by options:min=and:max=(defaults: 0 and 0.1); (3)blueis also uniformly distributed between:min=and:max=(defaults: 0 and 0.1), but rather than independent values, low frequencies are suppressed; (4)saltfor “salt and pepper” noise where a portion of pixels given by optionportion=(default: 0.1) is replaced with value given by optionvalue=(default: 0).Optional appended modifiers include:
:seed=intCan be used to change the random number seed.
:mono=1Make monochromatic noise (same value in all channels).
:nchannels=intLimit which channels are affected by the noise.
:subimages=indices-or-namesInclude/exclude subimages (see Dealing with multi-subimage/multi-part files).
Example:
# Add color gaussian noise to an image
oiiotool tahoe.jpg --noise:type=gaussian:stddev=0.1 -o noisy.jpg

# Simulate bad pixels by turning 1% of pixels black, but only in RGB
# channels (leave A alone)
oiiotool tahoe-rgba.tif --noise:type=salt:value=0:portion=0.01:mono=1:nchannels=3 \
    -o dropouts.tif
- --chsum#
Replaces the top image by a copy that contains only 1 color channel, whose value at each pixel is the sum of all channels of the original image. Using the optional weight allows you to customize the weight of each channel in the sum.
Optional appended modifiers include:
weight=r,g,…Specify the weight of each channel (default: 1).
:subimages=indices-or-namesInclude/exclude subimages (see Dealing with multi-subimage/multi-part files).
Example:
oiiotool RGB.tif --chsum:weight=.2126,.7152,.0722 -o luma.tif
- --contrast#
Remap pixel values from [black, white] to [min, max], with an optional smooth sigmoidal contrast stretch as well.
Optional appended modifiers include:
black=valsSpecify black value(s), default 0.0.
white=valsSpecify white value(s), default 1.0.
min=valsSpecify the minimum range value(s), default 0.0.
max=valsSpecify the maximum range value(s), default 1.0.
scontrast=valsSpecify sigmoidal contrast slope value(s),
default 1.0.
sthresh=valsSpecify sigmoidal threshold value(s) giving the position of maximum slope, default 0.5.
clamp=onIf on is nonzero, will optionally clamp all result channels to [min,max].
:subimages=indices-or-namesInclude/exclude subimages (see Dealing with multi-subimage/multi-part files).
Each vals may be either a single floating point value for all channels, or a comma-separated list of per-channel values.
Examples:
oiiotool tahoe.tif --contrast:black=0.1:white=0.75 -o linstretch.tif
oiiotool tahoe.tif --contrast:black=1.0:white=0.0:clamp=0 -o inverse.tif
oiiotool tahoe.tif --contrast:scontrast=5 -o sigmoid.tif
- --saturate <scale>#
Scale the saturation of the first three color channels of the image by the scale: 0.0 fully desaturates the image into its greyscale luminance equivalent image, 1.0 leaves the image unchanged,
scalevalues inside this range interpolate between them, andscale> 1 would increase apparent color saturation.Optional appended modifiers include:
:subimages=indices-or-namesInclude/exclude subimages (see Dealing with multi-subimage/multi-part files).
Examples:
oiiotool tahoe.exr --saturate 0 -o grey.exr
oiiotool tahoe.exr --saturate 2 -o colorful.exr
This command was added in OIIO 2.4.
- --colormap <mapname>#
Creates an RGB color map based on the luminance of the input image. The
mapnamemay be one of: “magma”, “inferno”, “plasma”, “viridis”, “turbo”, “blue-red”, “spectrum”, and “heat”. Or,mapnamemay also be a comma-separated list of RGB triples, to form a custom color map curve.Note that “magma”, “inferno”, “plasma”, “viridis” are perceptually uniform, strictly increasing in luminance, look good when converted to grayscale, and work for people with all types of colorblindness. The “turbo” color map also shares all of these qualities except for being strictly increasing in luminance. These are all desirable qualities that are lacking in the other, older, crappier maps (blue-red, spectrum, and heat). Don’t be fooled by the flashy “spectrum” colors — it is an empirically bad color map compared to the preferred ones.
Optional appended modifiers include:
:subimages=indices-or-namesInclude/exclude subimages (see Dealing with multi-subimage/multi-part files).
Example:
oiiotool tahoe.jpg --colormap inferno -o inferno.jpg
oiiotool tahoe.jpg --colormap viridis -o viridis.jpg
oiiotool tahoe.jpg --colormap turbo -o turbo.jpg
oiiotool tahoe.jpg --colormap .25,.25,.25,0,.5,0,1,0,0 -o custom.jpg
- --cryptomatte-colors <name>#
Creates an RGB image from the input image that contains Cryptomatte channels based on the given name, i.e.
<name>followed by a 2-digit number (00,01, …) followed by the channels (.red,.green,.blue,.alpha). Each Cryptomatte ID in the input will be given a unique color in the output image.This command was added in OpenImageIO 2.6.
Example:
oiiotool crypto.exr --cryptomatte-colors "CryptoAsset" -o matte.exr
- --paste <location>#
Takes two images – the first is the “foreground” and the second is the “background” – and uses the pixels of the foreground to replace those of the background, with foreground pixel (0,0) being pasted to the background at the location specified (expressed as
+xpos+ypos, e.g.,+100+50, or of course using-for negative offsets). Only pixels within the actual data region of the foreground image are pasted in this manner.Note that if location is +0+0, the foreground image’s data region will be copied to its same position in the background image (this is useful if you are pasting an image that already knows its correct data window offset).
Optional appended modifiers include:
mergeroi=1: If the value is nonzero, the result image will be sized to be the union of the input images (versus being the same data window as the background image). (Themergeroimodifier was added in OIIO 2.1.)all=1: If the value is nonzero, will paste all images on the image stack, not just the top two images. This can be useful to paste-merge many images at once, for example, if you have rendered a large image in abutting tiles and wish to re-assemble them into a single image. (Theallmodifier was added in OIIO 2.1.)
Examples:
# Result will be the size of bg, but with fg on top and with an
# offset of (100,100).
oiiotool fg.exr bg.exr -paste +100+100 -o out.exr

# Use "merge" mode, so result will be sized to contain both fg
# and bg. Also, paste fg into its natural position given by its
# data window.
oiiotool fg.exr bg.exr -paste:mergeroi=1 +0+0 -o out.exr

# Merge many non-overlapping "tiles" into one combined image
oiiotool img*.exr -paste:mergeroi=1:all=1 +0+0 -o combined.exr
- --pastemeta <location>#
Takes two images – the first will be a source of metadata only, and the second the source of pixels – and produces a new copy of the second image with the metadata from the first image added.
The output image’s pixels will come only from the second input. Metadata from the second input will be preserved if no identically-named metadata was present in the first input image.
Examples:
# Add all the metadata from meta.exr to pixels.exr and write the
# combined image to out.exr.
oiiotool meta.exr pixels.exr --pastemeta -o out.exr
- --mosaic <size>#
Removes \(w \times h\) images from the stack, dictated by the size, and turns them into a single image mosaic – an image that comprises \(w \times h\) “cells” each containing one of the constituent images.
If there are fewer images on the stack than the number of cells requested, the last cells will be black.
By default, the size of the “cell” is simply the largest of the constituent images, but the optional
fitparameter can instead dictate the cell size and constituent images will be resized to fit this cell size.Optional appended modifiers include:
fit=WxH : Sets the dimensions to which the constituent images will be resized as they are assembled into the mosaic.pad=num : Select the number of pixels of black padding to add between images (default: 0).
Examples:
oiiotool left.tif right.tif --mosaic:pad=16 2x1 -o out.tif

oiiotool 0.tif 1.tif 2.tif 3.tif 4.tif --mosaic:pad=16:fit=320x240 2x2 -o out.tif

- --over#
Replace the two top images with a new image that is the Porter/Duff “over” composite with the first image as the foreground and the second image as the background. Both input images must have the same number and order of channels and must contain an alpha channel.
Optional appended modifiers include:
:subimages=indices-or-namesInclude/exclude subimages (see Dealing with multi-subimage/multi-part files).
- --zover#
Replace the two top images with a new image that is a depth composite of the two images – the operation is the Porter/Duff “over” composite, but each pixel individually will choose which of the two images is the foreground and which background, depending on the “Z” channel values for that pixel (larger Z means farther away). Both input images must have the same number and order of channels and must contain both depth/Z and alpha channels. Optional appended modifiers include:
zeroisinf=numIf nonzero, indicates that z=0 pixels should be treated as if they were infinitely far away. (The default is 0, meaning that “zero means zero.””).
:subimages=indices-or-namesInclude/exclude subimages (see Dealing with multi-subimage/multi-part files).
- --rotate90#
Replace the current image with a new image that is rotated 90 degrees clockwise.
Optional appended modifiers include:
:subimages=indices-or-namesInclude/exclude subimages (see Dealing with multi-subimage/multi-part files).
Example:
oiiotool grid.jpg --rotate90 -o rotate90.jpg
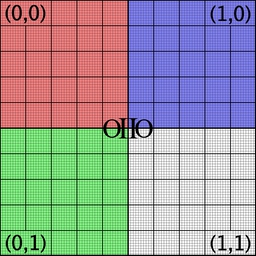
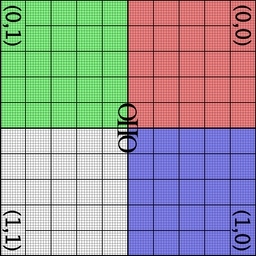
- --rotate180#
Replace the current image with a new image that is rotated by 180 degrees.
Optional appended modifiers include:
:subimages=indices-or-namesInclude/exclude subimages (see Dealing with multi-subimage/multi-part files).
Example:
oiiotool grid.jpg --rotate180 -o rotate180.jpg

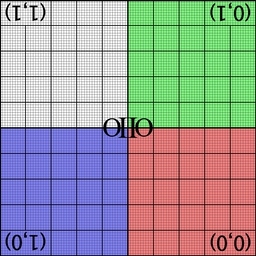
- --rotate270#
Replace the current image with a new image that is rotated 270 degrees clockwise (or 90 degrees counter-clockwise).
Optional appended modifiers include:
:subimages=indices-or-namesInclude/exclude subimages (see Dealing with multi-subimage/multi-part files).
Example:
oiiotool grid.jpg --rotate270 -o rotate270.jpg

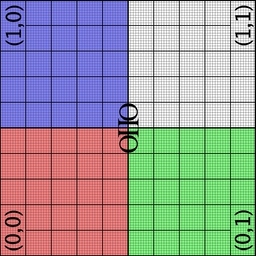
- --flip#
Replace the current image with a new image that is flipped vertically, with the top scanline becoming the bottom, and vice versa.
Optional appended modifiers include:
:subimages=indices-or-namesInclude/exclude subimages (see Dealing with multi-subimage/multi-part files).
Example:
oiiotool grid.jpg --flip -o flip.jpg

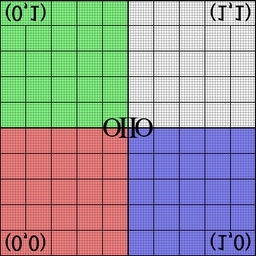
- --flop#
Replace the current image with a new image that is flopped horizontally, with the leftmost column becoming the rightmost, and vice versa.
Optional appended modifiers include:
:subimages=indices-or-namesInclude/exclude subimages (see Dealing with multi-subimage/multi-part files).
Example:
oiiotool grid.jpg --flop -o flop.jpg

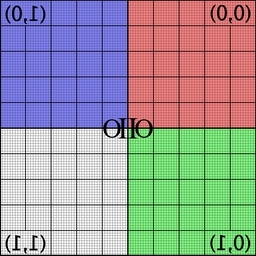
- --reorient#
Replace the current image with a new image that is rotated and/or flipped as necessary to move the pixels to match the Orientation metadata that describes the desired display orientation.
Example:
oiiotool tahoe.jpg --reorient -o oriented.jpg
- --transpose#
Replace the current image with a new image that is reflected about the x-y axis (x and y coordinates and sizes are swapped).
Optional appended modifiers include:
:subimages=indices-or-namesInclude/exclude subimages (see Dealing with multi-subimage/multi-part files).
Example:
oiiotool grid.jpg --transpose -o transpose.jpg

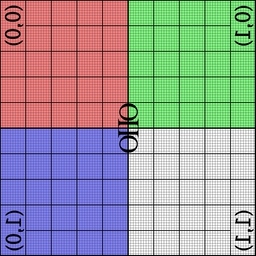
- --cshift <offset>#
Circularly shift the pixels of the image by the given offset (expressed as
+10+100to move by 10 pixels horizontally and 100 pixels vertically, or+50-30to move by 50 pixels horizontally and -30 pixels vertically. Circular shifting means that the pixels wrap to the other side as they shift.Optional appended modifiers include:
:subimages=indices-or-namesInclude/exclude subimages (see Dealing with multi-subimage/multi-part files).
Example:
oiiotool grid.jpg --cshift +70+30 -o cshift.jpg

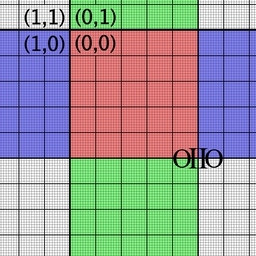
- --crop <size>#
Replace the current image with a new copy with the given size, cropping old pixels no longer needed, padding black pixels where they previously did not exist in the old image, and adjusting the offsets if requested.
The size is in the form
width x height [+-] xoffset [+-] yoffset
or
xmin,ymin,xmax,ymax
Note that
cropdoes not reposition pixels, it only trims or pads to reset the image’s pixel data window to the specified region.If oiiotool’s global
-aflag is used (all subimages), or if the optional--crop:allsubimages=1is employed, the crop will be applied identically to all subimages.Examples:
# Both of these crop to a 100x120 region that begins at x=35,y=40
oiiotool tahoe.exr --crop 100x120+35+40 -o crop.exr
oiiotool tahoe.exr --crop 35,40,134,159 -o crop.exr

- --croptofull#
Replace the current image with a new image that is cropped or padded as necessary to make the pixel data window exactly cover the full/display window.
- --trim#
Replace the current image with a new image that is cropped to contain the minimal rectangular ROI that contains all of the nonzero-valued pixels of the original image.
Examples:
oiiotool greenrect.exr -trim -o trimmed.jpg

.. image:: figures/pretrim.jpg
   :width: 1.5 in
.. image:: figures/trim.jpg
   :width: 1.5 in
- --cut <size>#
Replace the current image with a new copy with the given size, cropping old pixels no longer needed, padding black pixels where they previously did not exist in the old image, repositioning the cut region at the image origin (0,0) and resetting the full/display window to be identical to the new pixel data window. (In other words,
--cutis equavalent to--cropfollowed by--origin +0+0 --fullpixels.)The size is in the form
width x height [+-] xoffset [+-] yoffset
or
xmin,ymin,xmax,ymax
Examples:
# Both of these crop to a 100x120 region that begins at x=35,y=40
oiiotool tahoe.exr --cut 100x120+35+40 -o cut.exr
oiiotool tahoe.exr --cut 35,40,134,159 -o cut.exr


- --resample <size>#
Replace the current image with a new image that is resampled to the given pixel data resolution rapidly, but at a low quality, either by simple bilinear interpolation or by just copying the “closest” pixel. The size is in the form of any of these:
width x height
width x height [+-] xoffset [+-] yoffset
xmin,ymin,xmax,ymax
wscale% x hscale%
if
widthorheightis 0, that dimension will be automatically computed so as to preserve the original aspect ratio.Optional appended modifiers include:
interp=boolIf set to zero, it will just copy the “closest” pixel; if nonzero, bilinear interpolation of the surrounding 4 pixels will be used.
:subimages=indices-or-namesInclude/exclude subimages (see Dealing with multi-subimage/multi-part files).
Examples (suppose that the original image is 640x480):
--resample 1024x768         # new resolution w=1024, h=768
--resample 50%              # reduce resolution to 320x240
--resample 300%             # increase resolution to 1920x1440
--resample 400x0            # new resolution will be 400x300
- --resize <size>#
Replace the current image with a new image whose display (full) size is the given pixel data resolution and offset. The size is in the form
width x height
width x height [+-] xoffset [+-] yoffset
xmin,ymin,xmax,ymax
scale%
wscale% x hscale%
If
widthorheightis 0, that dimension will be automatically computed so as to preserve the original aspect ratio.By default, the scaling that occurs is to map the full/display window area of the input image to the full/display window of the output image (determined by the
sizeargument). However, a more general warping can be specified using any of the:from=,:to=, or:offset=optional modifiers. (These modifiers were added in OpenmageIO 2.5.)Optional appended modifiers include:
:from=sizeThe region (specified in any of the same forms as the size argument, with decimal / partial pixel sizes and offsets allowed) of the source image that defines the transformational mapping. This defaults to the full/display window of the source image.
:to=sizeThe region (specified in any of the same forms as the size argument, with decimal / partial pixel sizes and offsets allowed) of the destination image that defines the transformational mapping. This defaults to the full/display window of the destination image.
:filter=nameFilter name. The default is
blackman-harriswhen increasing resolution,lanczos3when decreasing resolution.:highlightcomp=valIf nonzero, does highlight compensation by surrounding the filtered operation with the equivalent of
--rangecompressand--rangeexpand, which can reduce visible ringing artifacts when a filter with negative lobes is used on a very high-contrast HDR image.:edgeclamp=boolIf nonzero, clamp the image to the edge pixels before filtering. This might help with certain edge ringing situations. The default is 0 (off).
:subimages=indices-or-namesInclude/exclude subimages (see Dealing with multi-subimage/multi-part files).
Examples (suppose that the original image is 640x480):
 --resize 1024x768         # new resolution w=1024, h=768
 --resize 50%              # reduce resolution to 320x240
 --resize 300%             # increase resolution to 1920x1440
 --resize 400x0            # new resolution will be 400x300

 # Create a 1024x768 image that is a resized and shifted version
 # of the original, where the upper left 100x100 section of the
 # original maps to a 200x200 region starting at the 50,50
 # coordinates of the new image.
 --resize:from=100x100:to=200x200+50+50 1024x768

# Resize to 320x240, but with an additional 1/2 pixel shift in
# each direction.
--resize:offset=+0.5+0.5 320x240
- --fit <size>#
Replace the current image with a new image that is resized to fit into the given pixel data resolution, keeping the original aspect ratio and padding with black pixels if the requested image size does not have the same aspect ratio. The size is in the form
width x height
width x height [+-] xoffset [+-] yoffset
Optional appended modifiers include:
filter=name : Filter name. The default isblackman-harriswhen increasing resolution,lanczos3when decreasing resolution.highlightcomp=val : If nonzero, does highlight compensation by surrounding the filtered operation with the equivalent of--rangecompressand--rangeexpand, which can reduce visible ringing artifacts when a filter with negative lobes is used on a very high-contrast HDR image.fillmode=mode : determines which of several methods will be used to determine how the image will fill the new frame, if its aspect ratio does not precisely match the original source aspect ratio:“width” exactly fills the width of the new frame, either cropping or letterboxing the height if it isn’t precisely the right size to preserve the original aspect ratio.
“height” exactly fills the height of the new frame, either cropping or letterboxing the width if it isn’t precisely the right size to preserve the original aspect ratio.
“letterbox” (the default) chooses whichever of “width” or “height” will maximally fill the new frame with no image data lost (it will only letterbox, never crop).
pad=p : If the argument is nonzero, will pad with black pixels to make the resulting image exactly the size specified, if the source and desired size are not the same aspect ratio.exact=e : If the argument is nonzero, will result in an exact match on aspect ratio and centering (partial pixel shift if necessary), whereas the default (0) will only preserve aspect ratio and centering to the precision of a whole pixel.wrap=wrapmode : For “exact” aspect ratio fitting, this determines the wrap mode used for the resizing kernel (default:black, other choices includeclamp,periodic,mirror).
Examples:
oiiotool in.exr --fit:pad=1:exact=1 640x480 -o out.exr

oiiotool in.exr --fit 1024x1024 -o out.exr

Examples of an image being fit into a frame that is wider than the original aspect ratio with fill mode: (a) original, (b) “width”, (c) “height”, (d) “letterbox”.

Examples of an image being fit into a frame that is narrower than the original aspect ratio with fill mode: (a) original, (b) “width”, (c) “height”, (d) “letterbox”.
- --pixelaspect <aspect>#
Replace the current image with a new image that scales up the width or height in order to match the requested pixel aspect ratio. If displayed in a manner that honors the PixelAspectRatio, it should look the same, but it will have different pixel dimensions than the original. It will always be the same or higher resolution, so it does not lose any detail present in the original.
As an example, if you have a 512x512 image with pixel aspect ratio 1.0,
--pixelaspect 2.0will result in a 512x1024 image that has “PixelAspectRatio” metadata set to 2.0.Optional appended modifiers include:
:filter=name : Filter name. The default islanczos3.:highlightcomp=val : If nonzero, does highlight compensation by surrounding the filtered operation with the equivalent of--rangecompressand--rangeexpand, which can reduce visible ringing artifacts when a filter with negative lobes is used on a very high-contrast HDR image.
Examples:
oiiotool mandrill.tif --pixelaspect 2.0 -o widepixels.tif
- --rotate <angle>#
Replace the current image with a new image that is rotated by the given angle (in degrees). Positive angles mean to rotate counter-clockwise, negative angles mean clockwise. By default, the center of rotation is at the exact center of the display window (a.k.a. “full” image), but can be explicitly set with the optional
center=x,yoption.Optional appended modifiers include:
:center=x,yAlternate center of rotation.
:filter=nameFilter name. The default is
lanczos3.:highlightcomp=valIf nonzero, does highlight compensation by surrounding the filtered operation with the equivalent of
--rangecompressand--rangeexpand, which can reduce visible ringing artifacts when a filter with negative lobes is used on a very high-contrast HDR image.:recompute_roi=valIf nonzero, recompute the pixel data window to exactly hold the transformed image (default=0).
:subimages=indices-or-namesInclude/exclude subimages (see Dealing with multi-subimage/multi-part files).
Examples:
oiiotool mandrill.tif --rotate 45 -o rotated.tif

oiiotool mandrill.tif --rotate:center=80,91.5:filter=lanczos3 45 -o rotated.tif

- --warp <M33>#
Replace the current image with a new image that is warped by the given 3x3 matrix (presented as a comma-separated list of values, without any spaces).
Optional appended modifiers include:
:filter=nameFilter name. The default is
lanczos3.:highlightcomp=valIf nonzero, does highlight compensation by surrounding the filtered operation with the equivalent of
--rangecompressand--rangeexpand, which can reduce visible ringing artifacts when a filter with negative lobes is used on a very high-contrast HDR image.:recompute_roi=valIf nonzero, recompute the pixel data window to exactly hold the transformed image (default=0).
:wrap=wrapmodeThe wrap mode to use when sampling the image for the warp. The default is
black; other choices includeclamp,periodic,mirror.:subimages=indices-or-namesInclude/exclude subimages (see Dealing with multi-subimage/multi-part files).
Examples:
oiiotool mandrill.tif --warp "0.707,0.707,0,-0.707,0.707,0,128,-53.02,1" -o warped.tif
- --st_warp#
Use the top image as a set of normalized
stimage coordinates to warp the second image in the stack.Optional appended modifiers include:
filter=nameFilter name. The default is
lanczos3.chan_s=indexThe index of the
schannel in thestimage (default=0).chan_t=indexThe index of the
tchannel in thestimage (default=1).flip_s=boolIf nonzero, mirror the
scoordinates along the horizontal axis. Useful for coordinates authored in terms of an origin other than the upper-left corner (default=0).flip_t=boolIf nonzero, mirror the
tcoordinates along the vertical axis. Useful for coordinates authored in terms of an origin other than the upper-left corner (default=0).
Examples:
oiiotool mandrill.tif distortion_st.tif --st_warp -o mandrill_distorted.tif

# Using an `st` map authored in terms of a lower-left origin (e.g. by
# Nuke), so flip the vertical (`t`) coordinate.
oiiotool mandrill.tif st_from_nuke.tif --st_warp:filter=triangle:flip_t=1 -o mandrill_distorted.tif
- --convolve#
Use the top image as a kernel to convolve the next image farther down the stack, replacing both with the result.
Optional appended modifiers include:
:subimages=indices-or-namesInclude/exclude subimages (see Dealing with multi-subimage/multi-part files).
Examples:
# Use a kernel image already prepared
oiiotool image.exr kernel.exr --convolve -o output.exr

# Construct a kernel image on the fly with --kernel
oiiotool image.exr --kernel gaussian 5x5 --convolve -o blurred.exr
- --blur <size>#
Blur the top image with a blur kernel of the given size expressed as width x height. (The sizes may be floating point numbers.)
Optional appended modifiers include:
kernel=nameKernel name. The default is
gaussian.:subimages=indices-or-namesInclude/exclude subimages (see Dealing with multi-subimage/multi-part files).
Examples:
oiiotool image.jpg --blur 5x5 -o blurred.jpg

oiiotool image.jpg --blur:kernel=bspline 7x7 -o blurred.jpg
- --median <size>#
Perform a median filter on the top image with a window of the given size expressed as width x height. (The sizes are integers.) This helps to eliminate noise and other unwanted high-frequency detail, but without blurring long edges the way a
--blurcommand would.Optional appended modifiers include:
:subimages=indices-or-namesInclude/exclude subimages (see Dealing with multi-subimage/multi-part files).
Examples:
oiiotool noisy.jpg --median 3x3 -o smoothed.jpg
- --dilate <size>#
- --erode <size>#
Perform dilation or erosion on the top image with a window of the given size expressed as width x height. (The sizes are integers.) Dilation takes the maximum of pixel values inside the window, and makes bright features wider and more prominent, dark features thinner, and removes small isolated dark spots. Erosion takes the minimum of pixel values inside the window, and makes dark features wider, bright features thinner, and removes small isolated bright spots.
Optional appended modifiers include:
:subimages=indices-or-namesInclude/exclude subimages (see Dealing with multi-subimage/multi-part files).
Examples:
oiiotool orig.tif --dilate 3x3 -o dilate.tif
oiiotool orig.tif --erode 3x3 -o erode.tif
oiiotool orig.tif --erode 3x3 --dilate 3x3 -o open.tif
oiiotool orig.tif --dilate 3x3 --erode 3x3 -o close.tif
oiiotool orig.tif --dilate 3x3 --erode 3x3 -sub -o gradient.tif
oiiotool orig.tif open.tif -o tophat.tif
oiiotool close.tif orig.tif -o bottomhat.tif
- --laplacian#
Calculates the Laplacian of the top image.
Optional appended modifiers include:
:subimages=indices-or-namesInclude/exclude subimages (see Dealing with multi-subimage/multi-part files).
Examples:
oiiotool tahoe.jpg --laplacian tahoe-laplacian.exr
- --unsharp#
Unblur the top image using an “unsharp mask.””
Optional appended modifiers include:
kernel=nameName of the blur kernel (default:
gaussian). If the kernel name ismedian, the unsarp mask algorithm will use a median filter rather than a blurring filter in order to compute the low-frequency image.width=wWidth of the blur kernel (default: 3).
contrast=cContrast scale (default: 1.0)
threshold=tThreshold for applying the difference (default: 0)
:subimages=indices-or-namesInclude/exclude subimages (see Dealing with multi-subimage/multi-part files).
Examples:
oiiotool image.jpg --unsharp -o sharper.jpg

oiiotool image.jpg --unsharp:width=5:contrast=1.5 -o sharper.jpg

oiiotool image.jpg --unsharp:kernel=median -o sharper.jpg
# Note: median filter helps emphasize compact high-frequency details
# without over-sharpening long edges as the default unsharp filter
# sometimes does.
- --fft#
- --ifft#
Performs forward and inverse unitized discrete Fourier transform. The forward FFT always transforms only the first channel of the top image on the stack, and results in a 2-channel image (with real and imaginary channels). The inverse FFT transforms the first two channels of the top image on the stack (assuming they are real and imaginary, respectively) and results in a single channel result (with the real component only of the spatial domain result).
Optional appended modifiers include:
:subimages=indices-or-namesInclude/exclude subimages (see Dealing with multi-subimage/multi-part files).
Examples:
# Select the blue channel and take its DCT
oiiotool image.jpg --ch 2 --fft -o fft.exr

# Reconstruct from the FFT
oiiotool fft.exr --ifft -o reconstructed.exr

# Output the power spectrum: real^2 + imag^2
oiiotool fft.exr --dup --mul --chsum -o powerspectrum.exr
- --polar#
- --unpolar#
The
--polartransforms a 2-channel image whose channels are interpreted as complex values (real and imaginary components) into the equivalent values expressed in polar form of amplitude and phase (with phase between 0 and \(2\pi\)).The
unpolarperforms the reverse transformation, converting from polar values (amplitude and phase) to complex (real and imaginary).Optional appended modifiers include:
:subimages=indices-or-namesInclude/exclude subimages (see Dealing with multi-subimage/multi-part files).
Examples:
oiiotool complex.exr --polar -o polar.exr
oiiotool polar.exr --unpolar -o complex.exr
- --fixnan <streategy>#
Replace the top image with a copy in which any pixels that contained
NaNorInfvalues (hereafter referred to collectively as “nonfinite”) are repaired. If strategy isblack, nonfinite values will be replaced with 0. If strategy isbox3, nonfinite values will be replaced by the average of all the finite values within a 3x3 region surrounding the pixel. If strategy iserror, nonfinite values will be left alone, but it will result in an error that will terminate oiiotool.
- --max#
- --maxc <value>#
- --maxc <value0,value1,value2...>
- --min#
- --minc <value>#
- --minc <value0,value1,value2...>
Replace the two top images with a new image that is the pixel-by-pixel maximum of those images (
--max) or minimum (--min) of the corresponding pixels of each image, or the min/max of each pixel of one image with a constant color (--maxc,--minc).For
--maxcand--minc, if a single constant value is given, it will be used for all color channels. Alternatively, a series of comma-separated constant values (with no spaces) may be used to specify a different value to add to each channel in the image.Optional appended modifiers include:
:subimages=indices-or-namesInclude/exclude subimages (see Dealing with multi-subimage/multi-part files).
Examples:
oiiotool imageA.tif imageB.tif –min -o minimum.tif
# Clamp all channels to a minimum of 0 (all negative values are # changed to 0). oiiotool input.exr –minc 0.0 -o nonegatives.exr
- --clamp#
Replace the top image with a copy in which pixel values have been clamped. Optional arguments include:
Optional appended modifiers include:
min=val : Specify a minimum value for all channels.min=val0,val1,… : Specify minimum value for each channel individually.max=val : Specify a maximum value for all channels.max=val0,val1,… : Specify maximum value for each channel individually.clampalpha=val : If val is nonzero, will additionally clamp the alpha channel to [0,1]. (Default: 0, no additional alpha clamp.)
If no value is given for either the minimum or maximum, it will NOT clamp in that direction. For the variety of minimum and maximum that specify per-channel values, a missing value indicates that the corresponding channel should not be clamped.
Examples:
--clamp:min=0: Clamp all channels to a minimum of 0 (all negative values are changed to 0).--clamp:min=0:max=1: Clamp all channels to [0,1].--clamp:clampalpha=1: Clamp the designated alpha channel to [0,1].--clamp:min=,,0:max=,,3.0: Clamp the third channel to [0,3], do not clamp & other channels.
- --maxchan#
- --minchan#
Replace the top image with a single channel image that, for each pixel, contains the maximum value (for
--maxchan) or minimum value (for--minchan) of all the channels in the corresponding pixel of the original image.This command was first added to OpenImageIO 2.4.0.
Optional appended modifiers include:
:subimages=indices-or-namesInclude/exclude subimages (see Dealing with multi-subimage/multi-part files).
Examples:
oiiotool RGB.tif –maxchan -o max_of_RGB.tif
- --rangecompress#
- --rangeexpand#
Range compression re-maps input values to a logarithmic scale. Range expansion is the inverse mapping back to a linear scale. Range compression and expansion only applies to color channels; alpha or z channels will not be modified.
By default, this transformation will happen to each color channel independently. But if the optional
lumaargument is nonzero and the image has at least 3 channels and the first three channels are not alpha or depth, they will be assumed to be RGB and the pixel scaling will be done using the luminance and applied equally to all color channels. This can help to preserve color even when remapping intensity.Optional appended modifiers include:
luma=valval is 0, turns off the luma behavior.
:subimages=indices-or-namesInclude/exclude subimages (see Dealing with multi-subimage/multi-part files).
Range compression and expansion can be useful in cases where high contrast super-white (> 1) pixels (such as very bright highlights in HDR captured or rendered images) can produce undesirable artifacts, such as if you resize an HDR image using a filter with negative lobes – which could result in objectionable ringing or even negative result pixel values. For example:
oiiotool hdr.exr --rangecompress --resize 512x512 --rangeexpand -o resized.exr
- --fillholes#
Replace the top image with a copy in which any pixels that had \(\alpha < 1\) are “filled” in a smooth way using data from surrounding \(\alpha > 0\) pixels, resulting in an image that is \(\alpha = 1\) and plausible color everywhere. This can be used both to fill internal “holes” as well as to extend an image out.
- --box <x1,y1,x2,y2>#
Draw (rasterize) a filled or unfilled a box with opposite corners
(x1,y1)and(x2,y2). Additional optional arguments include:color=r,g,b,…specify the color of the lines
fill=boolif nonzero, fill in the box
:subimages=indices-or-namesInclude/exclude subimages (see Dealing with multi-subimage/multi-part files).
The default color, if not supplied, is opaque white.
Examples:
oiiotool checker.exr --box:color=0,1,1,1 150,100,240,180 \
             --box:color=0.5,0.5,0,0.5:fill=1 100,50,180,140 -o out.exr

- --line <x1,y1,x2,y2,...>#
Draw (rasterize) an open polyline connecting the list of pixel positions, as a comma-separated list of alternating x and y values. Additional optional arguments include:
color=r,g,b,…specify the color of the line
:subimages=indices-or-namesInclude/exclude subimages (see Dealing with multi-subimage/multi-part files).
The default color, if not supplied, is opaque white.
Examples:
oiiotool checker.exr --line:color=1,0,0 10,60,250,20,100,190 -o out.exr

- --point <x1,y1,x2,y2,...>#
Draw single points at the list of pixel positions, as a comma-separated list of alternating x and y values. Additional optional arguments include:
color=r,g,b,…specify the color of the line
:subimages=indices-or-namesInclude/exclude subimages (see Dealing with multi-subimage/multi-part files).
The default color, if not supplied, is opaque white.
Examples:
oiiotool checker.exr --point:color=1,0,0 10,60,250,20,100,190 -o out.exr

- --fill <size>#
Alter the top image by filling the ROI specified by size. The fill can be a constant color, vertical gradient, horizontal gradient, or four-corner gradient.
Optional modifiers for constant color:
color=r,g,b,…the color of the constant
Optional modifiers for vertical gradient:
top=r,g,b,…the color for the top edge of the region
bottom=r,g,b,…the color for the bottom edge of the region
Optional modifiers for horizontal gradient:
left=r,g,b,…the color for the left edge of the region
right=r,g,b,…the color for the right edge of the region
Optional modifiers for 4-corner gradient:
topleft=r,g,b,…the color for the top left corner of the region
topright=r,g,b,…the color for the top right corner of the region
bottomleft=r,g,b,…the color for the bottom left corner of the region
bottomright=r,g,b,…the color for the bottom right corner of the region
Examples:
# make a grey-to-blue vertical gradient
oiiotool --create 640x480 3 \
    --fill:top=0.1,0.1,0.1:bottom=0,0,0.5 640x480 -o gradient.tif

# make a grey-to-green horizontal gradient
oiiotool --create 640x480 3 \
    --fill:left=0.1,0.1,0.1:right=0,0.75,0 640x480 -o gradient.tif

# four-corner interpolated gradient
oiiotool --create 640x480 3 \
    -fill:topleft=.1,.1,.1:topright=1,0,0:bottomleft=0,1,0:botromright=0,0,1 \
        640x480 -o gradient.tif
- --text <words>#
Draw (rasterize) text overtop of the current image.
Optional appended modifiers include:
x=xposx position (in pixel coordinates) of the text
y=yposy position (in pixel coordinates) of the text
size=sizefont size (height, in pixels)
font=namefont name, full path to the font file on disk (use double quotes
"name"if the path name includes spaces or a colon)color=r,g,b,…specify the color of the text
xalign=valcontrols horizontal text alignment:
left(default),right,center.yalign=valcontrols vertical text alignment:
base(default),top,bottom,center.shadow=sizeif nonzero, will make a dark shadow halo to make the text more clear on bright backgrounds.
:subimages=indices-or-namesInclude/exclude subimages (see Dealing with multi-subimage/multi-part files).
The default positions the text starting at the center of the image, drawn 16 pixels high in opaque white in all channels (1,1,1,…), and using a default font (which may be system dependent).
Examples:
oiiotool --create 320x240 3 --text:x=10:y=400:size=40 "Hello world" \
    --text:x=100:y=200:font="Arial Bold":color=1,0,0:size=60 "Go Big Red!" \
    --tocolorspace sRGB -o text.jpg

oiiotool --create 320x240 3 --text:x=160:y=120:xalign=center "Centered" \
    --tocolorspace sRGB -o textcentered.jpg

oiiotool tahoe-small.jpg \
        --text:x=160:y=40:xalign=center:size=40:shadow=0 "shadow = 0" \
        --text:x=160:y=80:xalign=center:size=40:shadow=1 "shadow = 1" \
        --text:x=160:y=120:xalign=center:size=40:shadow=2 "shadow = 2" \
        --tocolorspace sRGB -o textshadowed.jpg
Note that because of slightly differing fonts and versions of Freetype available, we do not expect drawn text to be pixel-for-pixel identical on different platforms supported by OpenImageIO.
oiiotool commands for color management#
Many of the color management commands depend on an installation of OpenColorIO (http://opencolorio.org).
If OIIO has been compiled with OpenColorIO support and the environment
variable $OCIO is set to point to a valid OpenColorIO configuration file,
you will have access to all the color spaces that are known by that OCIO
configuration. Alternately, you can use the --colorconfig option to
explicitly point to a configuration file. If no valid configuration file is
found (either in $OCIO or specified by --colorconfig} or OIIO was not
compiled with OCIO support, then the only color space transformats available
are linear to Rec709 (and vice versa) and linear to sRGB (and vice
versa).
If you ask for oiiotool help (oiiotool --help), at the very
bottom you will see the list of all color spaces, looks, and displays that
oiiotool knows about. That information (including even more detail)
will be printed with the command oiiotool --colorconfiginfo.
- --colorconfiginfo#
Print to the console extensive information about the color management configuration, including the list of all known color spaces (and their aliases), looks, displays (and their views), as well as which version of OpenColorIO is being used, and the path to the configuration file.
This command was added in OIIO 2.4.6.
- --colorconfig <filename>#
Instruct oiiotool to read an OCIO configuration from a custom location. Without this, the default is to use the
$OCIOenvironment variable as a guide for the location of the configuration file.
- --iscolorspace <colorspace>#
Alter the metadata of the current image so that it thinks its pixels are in the named color space. This does not alter the pixels of the image, it only changes oiiotool’s understanding of what color space those those pixels are in.
- --colorconvert <fromspace> <tospace>#
Replace the current image with a new image whose pixels are transformed from the named fromspace color space into the named tospace (disregarding any notion it may have previously had about the color space of the current image). Optional appended modifiers include:
key=name,value=str :Adds a key/value pair to the “context” that OpenColorIO will used when applying the look. Multiple key/value pairs may be specified by making each one a comma-separated list.
unpremult=val :If the numeric val is nonzero, the pixel values will be “un-premultipled” (divided by alpha) prior to the actual color conversion, and then re-multipled by alpha afterwards. The default is 0, meaning the color transformation not will be automatically bracketed by divide-by-alpha / mult-by-alpha operations.
strict=val :When nonzero (the default), an inability to perform the color transform will be a hard error. If strict is 0, inability to find the transformation will just print a warning and simply copy the image without changing colors.
:subimages=indices-or-namesInclude/exclude subimages (see Dealing with multi-subimage/multi-part files).
- --tocolorspace <tospace>#
Replace the current image with a new image whose pixels are transformed from their existing color space (as best understood or guessed by OIIO) into the named tospace. This is equivalent to a use of
oiiotool --colorconvertwhere the fromspace is automatically deduced.Optional appended modifiers include:
:subimages=indices-or-namesInclude/exclude subimages (see Dealing with multi-subimage/multi-part files).
- --ccmatrix <m00,m01,...>#
NEW 2.1
Replace the current image with a new image whose colors are transformed according to the 3x3 or 4x4 matrix formed from the 9 or 16 comma-separated floating-point values in the subsequent argument (spaces are allowed only if the whole collection of values is enclosed in quotes so that they are a single command-line argument).
The values fill in the matrix left to right, first row, then second row, etc. This means that colors are treated as “row vectors” that are post-multiplied by the matrix (
C*M).Optional appended modifiers include:
unpremult=val :If the numeric val is nonzero, the pixel values will be “un-premultipled” (divided by alpha) prior to the actual color conversion, and then re-multipled by alpha afterwards. The default is 0, meaning the color transformation not will be automatically bracketed by divide-by-alpha / mult-by-alpha operations.
invert=val :If nonzero, this will cause the matrix to be inverted before being applied.
transpose=val :If nonzero, this will cause the matrix to be transposed (this allowing you to more easily specify it as if the color values were column vectors and the transformation as
M*C).:subimages=indices-or-namesInclude/exclude subimages (see Dealing with multi-subimage/multi-part files).
Example:
# Convert ACES to ACEScg using a matrix
oiiotool aces.exr --ccmatrix:transpose=1 \
    "1.454,-0.237,-0.215,-0.077,1.176,-0.010,0.008,-0.006, 0.998" \
    -o acescg.exr
- --ociolook <lookname>#
Replace the current image with a new image whose pixels are transformed using the named OpenColorIO look description. Optional appended arguments include:
from=valAssume the image is in the named color space. If no
from=is supplied, it will try to deduce it from the image’s metadata or previous--iscolorspacedirectives. If no such hints are available, it will assume the pixel data are in the default linear scene-referred color space.to=valConvert to the named space after applying the look.
inverse=valIf val is nonzero, inverts the color transformation and look application.
key=name,value=strAdds a key/value pair to the “context” that OpenColorIO will used when applying the look. Multiple key/value pairs may be specified by making each one a comma-separated list.
unpremult=val :If the numeric val is nonzero, the pixel values will be “un-premultipled” (divided by alpha) prior to the actual color conversion, and then re-multipled by alpha afterwards. The default is 0, meaning the color transformation not will be automatically bracketed by divide-by-alpha / mult-by-alpha operations.
:subimages=indices-or-namesInclude/exclude subimages (see Dealing with multi-subimage/multi-part files).
This command is only meaningful if OIIO was compiled with OCIO support and the environment variable
$OCIOis set to point to a valid OpenColorIO configuration file. If you ask for oiiotool help (oiiotool --help), at the very bottom you will see the list of all looks that oiiotool knows about.Examples:
oiiotool in.jpg --ociolook:from=vd8:to=vd8:key=SHOT:value=pe0012 match -o cc.jpg
- --ociodisplay <displayname> <viewname>#
Replace the current image with a new image whose pixels are transformed using the named OpenColorIO “display” transformation given by the displayname and viewname. The word
"default"(or the empty string"") for displayname means to use the default display, and"default"or""for viewname means to use the default view on that display.Optional appended modifiers include:
from=nameAssume the image is in the named color space. If no
from=is supplied, it will try to deduce it from the image’s metadata or previous--iscolorspacedirectives. If no such hints are available, it will assume the pixel data are in the default linear scene-referred color space.key=name,value=strAdds a key/value pair to the “context” that OpenColorIO will used when applying the look. Multiple key/value pairs may be specified by making each one a comma-separated list.
unpremult=val :If the numeric val is nonzero, the pixel values will be “un-premultipled” (divided by alpha) prior to the actual color conversion, and then re-multipled by alpha afterwards. The default is 0, meaning the color transformation not will be automatically bracketed by divide-by-alpha / mult-by-alpha operations.
inverse=val :If val is nonzero, inverts the color transformation.
:subimages=indices-or-namesInclude/exclude subimages (see Dealing with multi-subimage/multi-part files).
This command is only meaningful if OIIO was compiled with OCIO support and the environment variable
$OCIOis set to point to a valid OpenColorIO configuration file. If you ask for oiiotool help (oiiotool --help), at the very bottom you will see the list of all looks that oiiotool knows about.Examples:
oiiotool in.exr --ociodisplay:from=lnf:key=SHOT:value=pe0012 sRGB Film -o cc.jpg
- --ociofiletransform <name>#
Replace the current image with a new image whose pixels are transformed using the named OpenColorIO file transform. Optional appended arguments include:
inverse=val :If val is nonzero, inverts the color transformation.
unpremult=val :If the numeric val is nonzero, the pixel values will be “un-premultipled” (divided by alpha) prior to the actual color conversion, and then re-multipled by alpha afterwards. The default is 0, meaning the color transformation not will be automatically bracketed by divide-by-alpha / mult-by-alpha operations.
:subimages=indices-or-namesInclude/exclude subimages (see Dealing with multi-subimage/multi-part files).
Examples:
oiiotool in.jpg --ociofiletransform footransform.csp -o out.jpg
- --unpremult#
Divide all color channels (those not alpha or z) of the current image by the alpha value, to “un-premultiply” them. This presumes that the image starts of as “associated alpha,” a.k.a. “premultipled.” Pixels in which the alpha channel is 0 will not be modified (since the operation is undefined in that case). This is a no-op if there is no identified alpha channel.
Optional appended modifiers include:
:subimages=indices-or-namesInclude/exclude subimages (see Dealing with multi-subimage/multi-part files).
- --premult#
Multiply all color channels (those not alpha or z) of the current image by the alpha value, to “premultiply’’ them. This presumes that the image starts of as “unassociated alpha,’’ a.k.a. “non-premultipled.”
Optional appended modifiers include:
:subimages=indices-or-namesInclude/exclude subimages (see Dealing with multi-subimage/multi-part files).
- --iccread <filename>#
The
--iccreadcommand adds an"ICCProfile"attribute to the top image, as a byte array consisting of the entire contents of the named file.This was added to OpenImageIO 2.5.
- --iccwrite <filename>#
Extract the
"ICCProfile"attribute from the top image and writing it to the named file.This was added to OpenImageIO 2.5.
oiiotool commands for deep images#
A number of oiiotool operations are designed to work with “deep” images. These are detailed below. In general, operations not listed in this section should not be expected to work with deep images.
Commands specific to deep images#
- --deepen#
If the top image is not deep, then turn it into the equivalent “deep” image. Pixels with non-infinite $z$ or with any non-zero color channels will get a single depth sample in the resulting deep image. Pixels in the source that have 0 in all channels, and either no “Z” channel or a $z$ value indicating an infinite distance, will result in a pixel with no depth samples.
Optional appended modifiers include:
z=valThe depth to use for deep samples if the source image did not have a “Z” channel. (The default is 1.0.)
:subimages=indices-or-namesInclude/exclude subimages (see Dealing with multi-subimage/multi-part files).
- --flatten#
If the top image is “deep,” then “flatten” it by compositing the depth samples in each pixel.
Optional appended modifiers include:
:subimages=indices-or-namesInclude/exclude subimages (see Dealing with multi-subimage/multi-part files).
- --deepmerge#
Replace the two top images with a new deep image that is the “deep merge” of the inputs. Both input images must be deep images, have the same number and order of channels and must contain an alpha channel and depth channel.
Optional appended modifiers include:
:subimages=indices-or-namesInclude/exclude subimages (see Dealing with multi-subimage/multi-part files).
- --deepholdout#
Replace the two top images with a new deep image that is the ``deep holdout’’ of the first image by the second — that is, the samples from the first image that are closer than the opaque frontier of the second image. Both input inputs must be deep images.
Optional appended modifiers include:
:subimages=indices-or-namesInclude/exclude subimages (see Dealing with multi-subimage/multi-part files).
General commands that also work for deep images#
- --addc, --subc, --mulc, --divc#
Adding, subtracting, multiplying, or dividing a per-channel constant will work for deep images, performing the operation for every sample in the image.
- --autotrim#
For subsequent outputs, automatically
--trimbefore writing the file.
- --ch <channellist>#
Reorder, rename, remove, or add channels to a deep image. See Section oiiotool commands that shuffle channels or subimages
- --crop <size>#
Crop (adjust the pixel data window), removing pixels or adding empty pixels as needed.
- --paste <position>#
Replace one image’s pixels with another’s (at an arbitrary offset).
(This functionality was extended to deep images in OIIO 2.1.)
- --resample <size>#
Resampling (resize without filtering or interpolation, just choosing the closest deep pixel to copy for each output pixel).
Optional appended modifiers include:
interp=val : If 0, the “closest” single pixel will be copied for each sample. If 1, the nearest 4 pixels will be interpolated to produce each sample. (Default: 1)
- --diff#
Report on the difference of the top two images.
- --dumpdata#
Print to the console detailed information about the values in every pixel.
Optional appended modifiers include:
empty=val : If 0, will cause deep images to skip printing of information about pixels with no samples, and cause non-deep images to skip printing information about pixels that are entirely 0.0 value in all channels.
- --info#
Prints information about each input image as it is read.
- --trim#
Replace the current image with a new image that is cropped to contain the minimal rectangular ROI that contains all of the non-empty pixels of the original image.
- --stats#
Prints detailed statistical information about each input image as it is read.
- --fixnan <streategy>#
Replace the top image with a copy in which any pixels that contained
NaNorInfvalues (hereafter referred to collectively as “nonfinite”) are repaired. The strategy may be eitherblackorerror.
